
Sponsored project disclosure: CINOTON provided the lighting system for this Ultimate DIYer project. The installation observations and comparisons are our own. Some product links may be affiliate links.
What if you could decorate your house for Christmas, Halloween, the Fourth of July, or just an ordinary evening—and never have to hang and remove those lights again? That is the promise behind permanent outdoor lighting. But before you attach the first light, there is a decision that may matter even more than which color you choose: where you mount the lights.
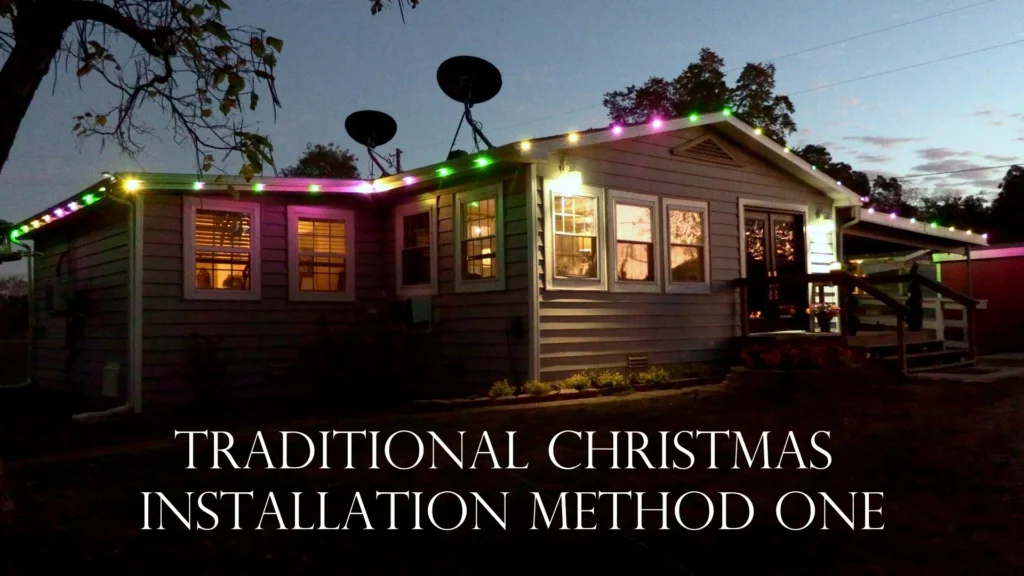
For this project, we worked with the CINOTON Permanent Outdoor Lights 2 Pro, 200-foot kit with 120 RGBCW LEDs. The goal was to compare two dramatically different styles: a traditional, visible holiday-light appearance along the outside roofline and a more understated accent-light look beneath the eaves. The same flat LED disks can create different effects depending on their mounting surface and orientation.
Featured product: CINOTON Permanent Outdoor Lights 2 Pro — 200 ft, 120 RGBCW LEDs (check current price and availability). Affiliate link: we may earn a commission at no additional cost to you.
Traditional vs. accent lighting: two approaches
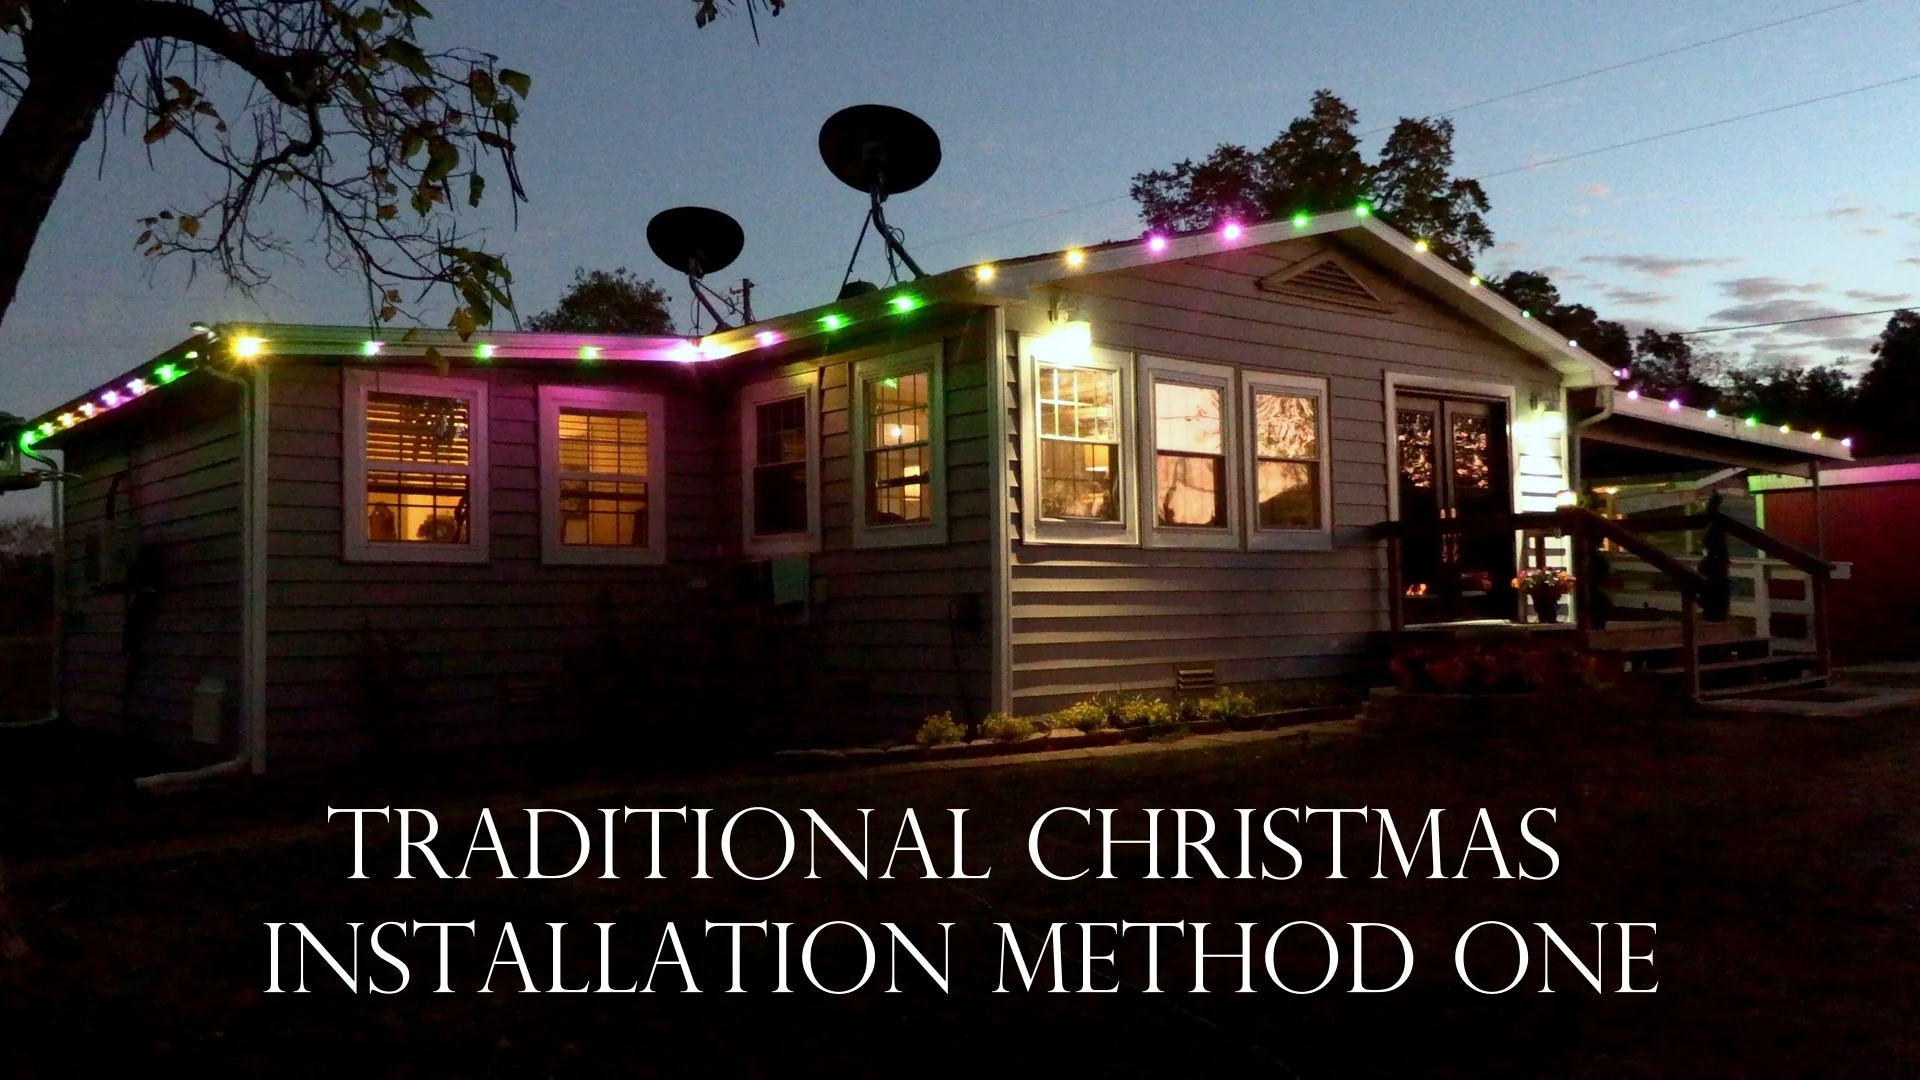
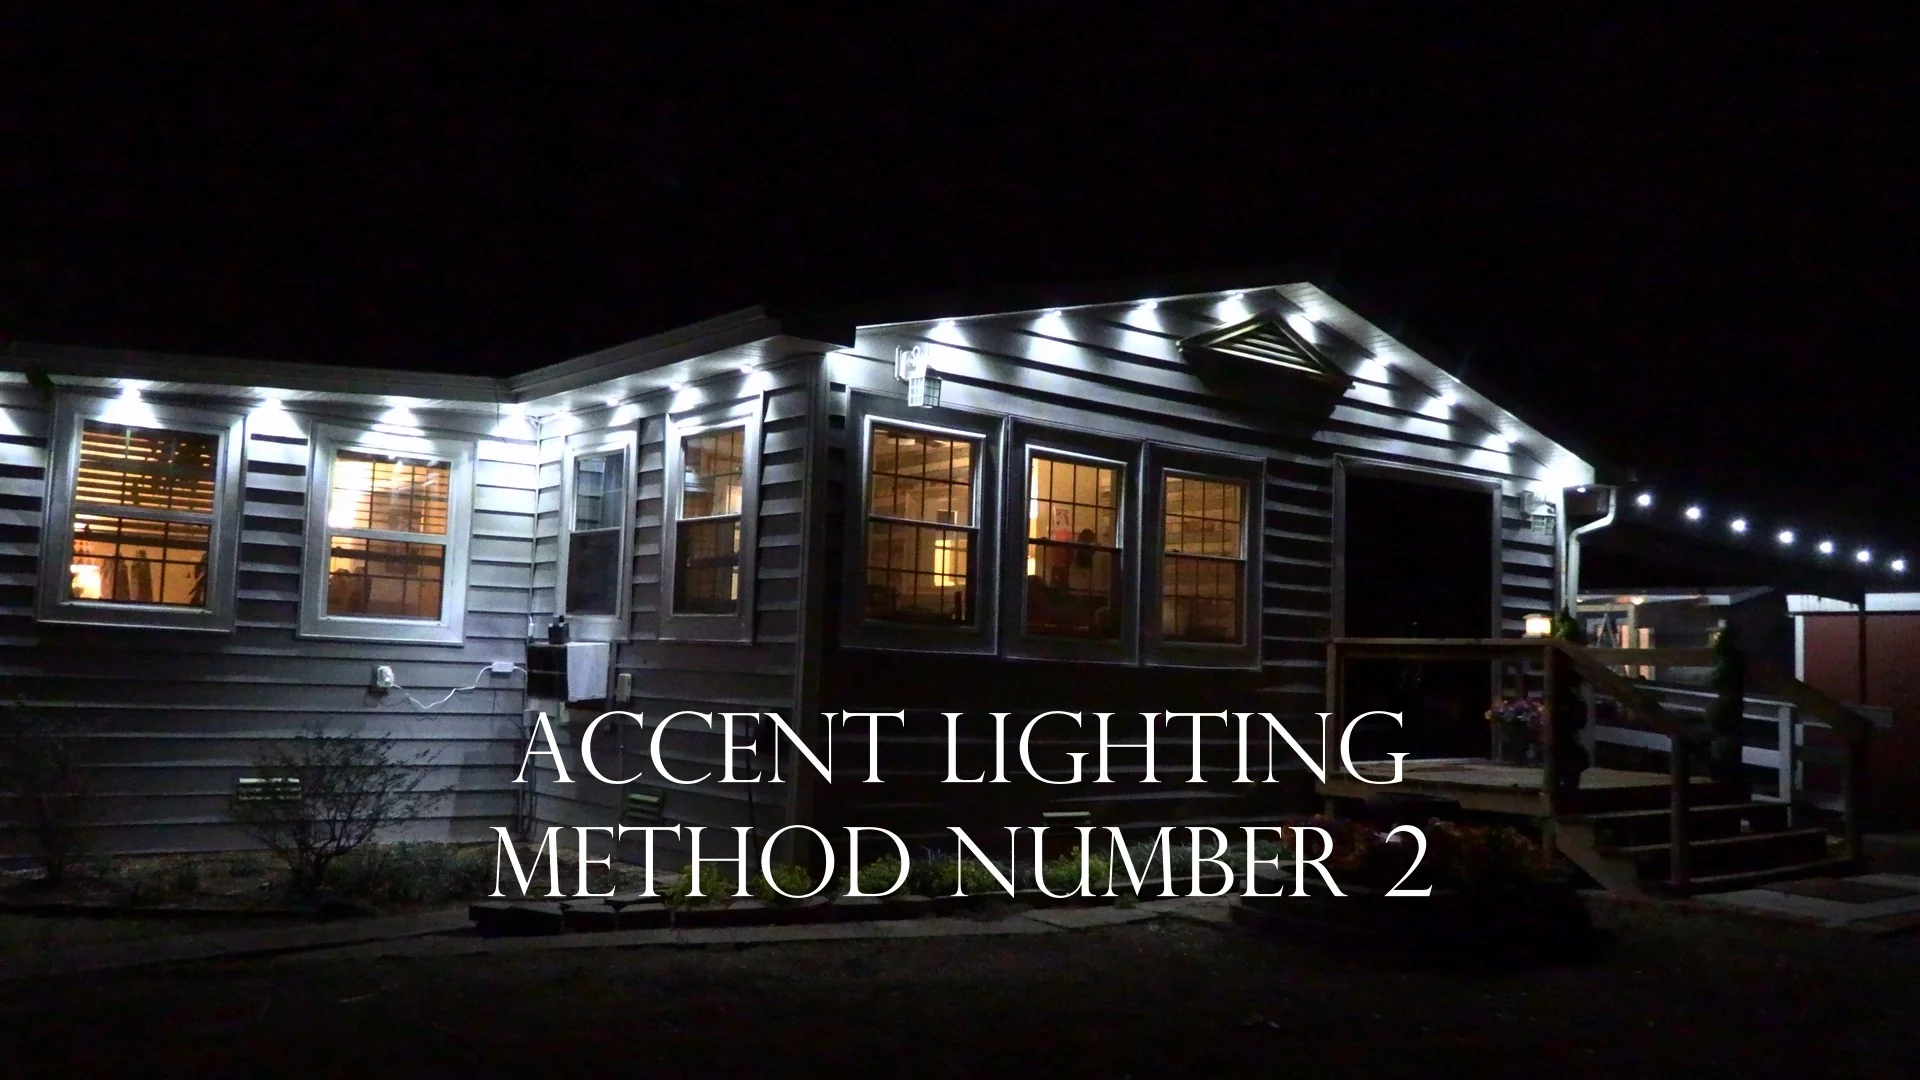
These CINOTON light disks have flat faces. When mounted under a horizontal soffit they shine straight down; they do not pivot toward the siding. Distance from the wall affects the resulting wash of light.
Watch the installation and nighttime comparison
Watch the full installation and nighttime comparison on YouTube.
1. Plan the complete lighting run
Walk the entire roofline with a tape measure before choosing your first attachment point. Mark the outlet location, controller location, corners, gutter transitions, changes in roof height, any sections you want to skip, and where each lighting branch ends. Lay out the eight modular 25-foot sections before mounting them so you do not discover a routing problem at the last corner.
These are the planning questions I would answer first: Where is the nearest suitable weather-protected power connection? Would the controller be more useful at the front or back of the home? Which roofline sections need accent lighting rather than traditional holiday lighting? Where will an extension or approved splice be necessary? And can the system be serviced without dismantling large sections?
Map both the traditional and accent portions of the project before attaching the first strip, and test the entire set on the ground so an incorrect connection is discovered before anyone gets on a ladder.
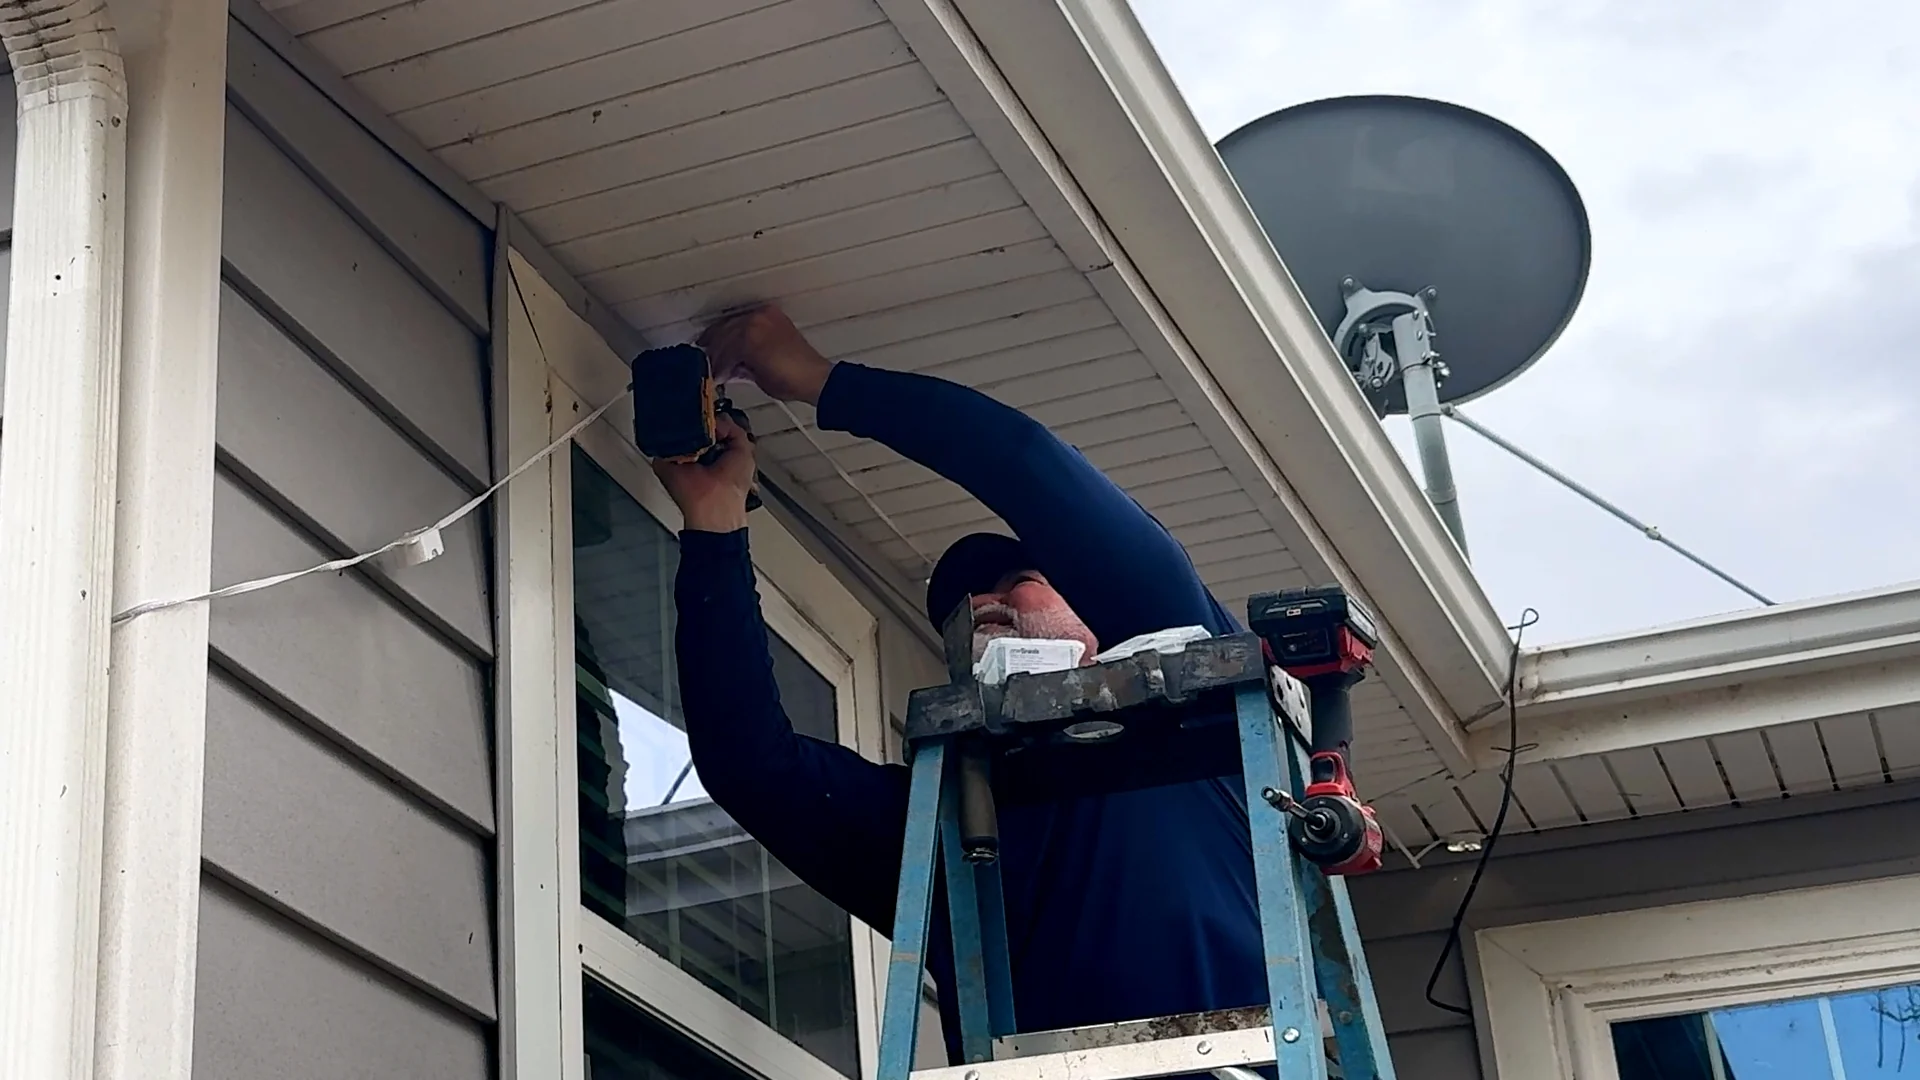
2. Under-eave mounting and spacing
Method 1: Traditional roofline mounting
For a festive, visible holiday look, place the light disks along the outside edge of the eave or roofline, mounted in a manufacturer-approved orientation with their illuminated faces visible outward. This is the style we initially used on much of the country-house installation. It emphasizes individual points of light and animated color across the building outline.
Best for: Christmas colors, Halloween effects, patriotic displays, high-visibility holiday scenes, and homeowners who want the light fixtures themselves to be part of the show.
Method 2: Under-eave or soffit accent mounting
For a subtler everyday effect, mount the disks flat under a horizontal soffit, with the light-emitting faces pointing straight down. This can emphasize the porch, the ground below, and portions of the siding depending on the eave geometry. It is not the same as aiming an adjustable spotlight at the wall: these CINOTON disks do not swivel or tilt.
Best for: year-round accent lighting, a less conspicuous daytime appearance, and homeowners who prefer downward illumination instead of a visible string of colorful roofline lights.
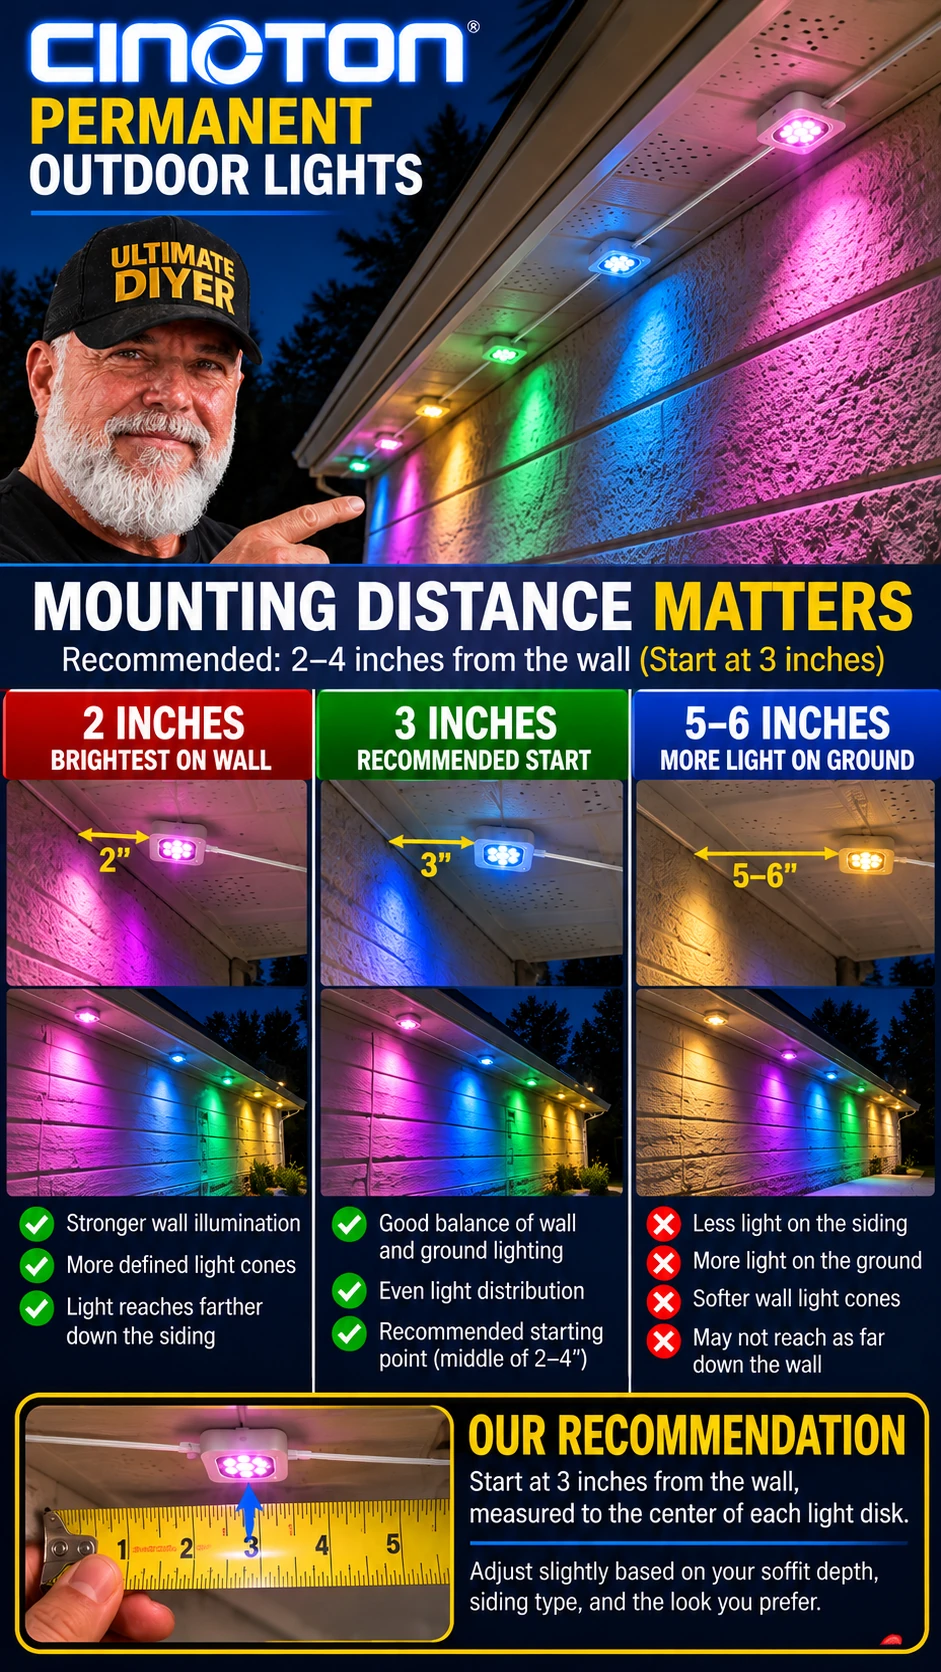
How far from the wall should soffit lights be?
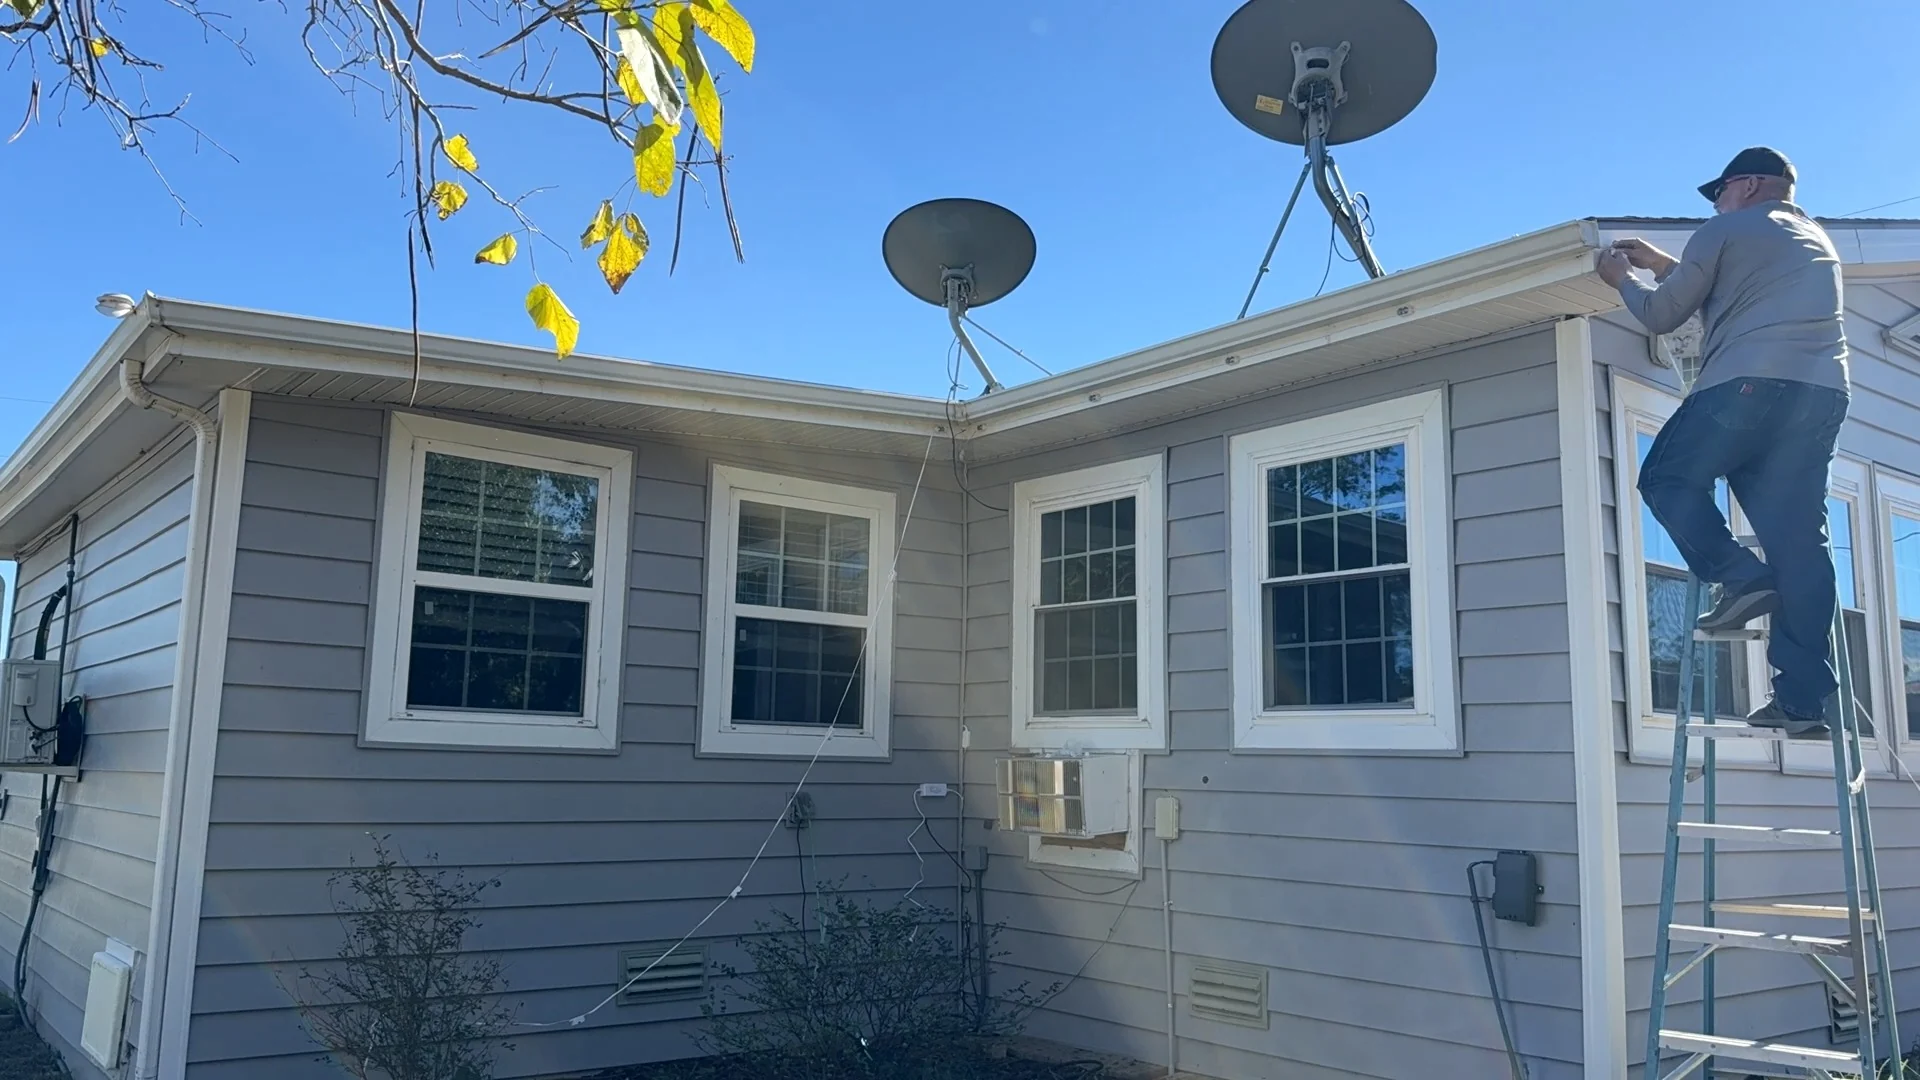
For a test section, start approximately 3 inches from the siding to the center of each disk, then compare positions around 2, 3, and 5–6 inches if your soffit allows it. These are testing positions, not a verified CINOTON mounting specification. Because the disks point downward, moving them closer or farther from the wall changes where the beam lands; it does not change the angle of the LED.
A closer position may produce more visible light on the wall, while a farther position may direct more illumination toward the ground. The result depends on soffit depth, height, beam spread, wall finish, and brightness. Temporarily position a few fixtures and check them after dark before fastening a complete run. The best appearance is the one you actually observe on your house.
3. Place the power and controller where you entertain
Important installation tip: If music-reactive lighting is a goal, plan the outdoor power connection and inline controller near your pool, patio, outdoor kitchen or entertainment area, where it can hear the speakers you actually use.
My biggest overlooked tip: think about the music microphone
The music-sync microphone is built into the inline controller along the power cord, according to CINOTON’s technical guidance—not into the phone controlling the lights. That means music playing near your phone at the front of the house may not be detected by a controller tucked away at the opposite end of the property.
If you entertain near a pool, patio, outdoor kitchen, or backyard speaker system, consider locating the controller within practical listening distance of that entertainment area. This does not mean leaving the electrical adapter exposed by the pool. Keep electrical components in manufacturer-approved, protected locations and observe outlet and pool-clearance requirements. Plan the power-supply location and the microphone/controller location together before mounting your runs.
You may also see app options for individually assigned lights or sections. However, do not assume that turning front-of-house lights off while backyard lights react to music is supported in every music-sync mode; that combined behavior still needs to be tested on this exact setup.
The sound-reactive function relies on the built-in microphone in the inline power/on-off controller, not a microphone in every light. Play the music through an external speaker near the controller. The app selects the effect; it does not automatically stream the audio through each light.
Test the controller’s listening distance with the real outdoor speaker before permanently placing the system. Keep the power adapter, receptacle and controller in appropriate, manufacturer-approved protected locations; GFCI and pool-clearance requirements still apply.
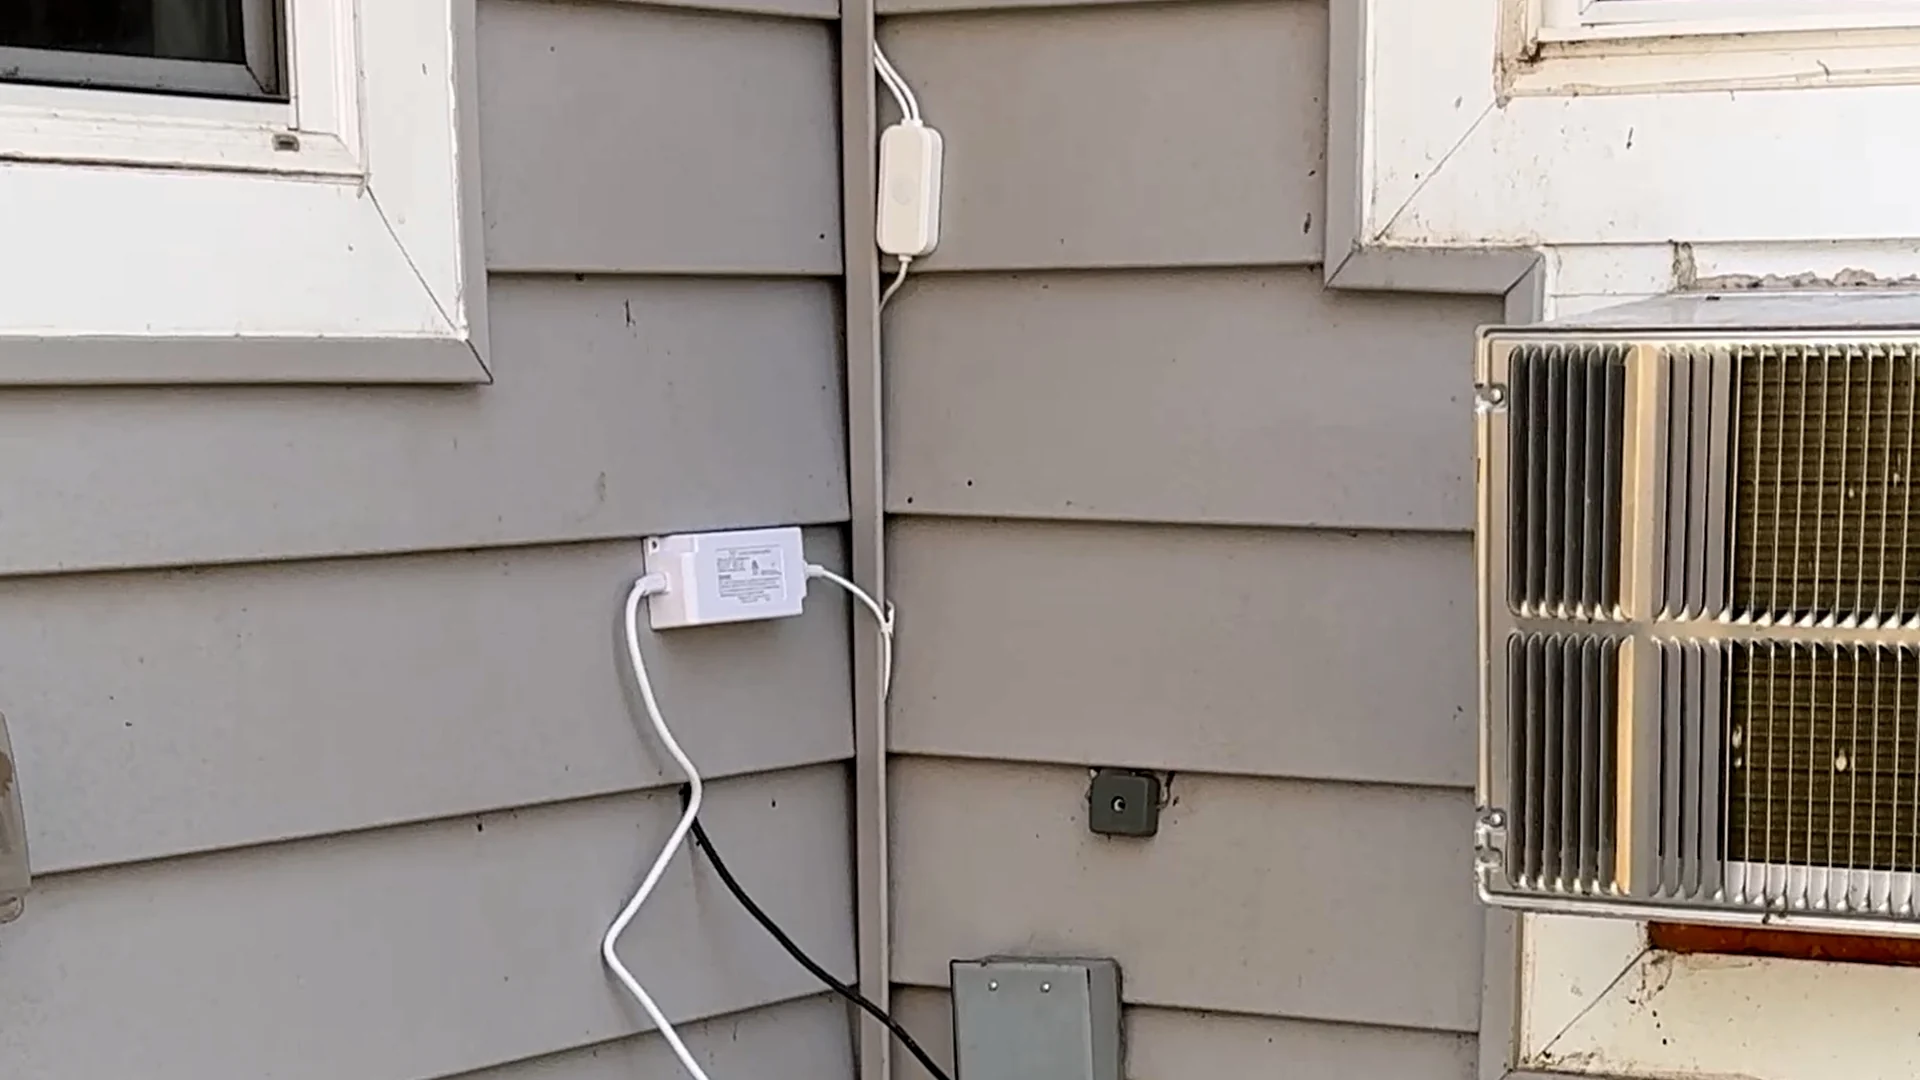
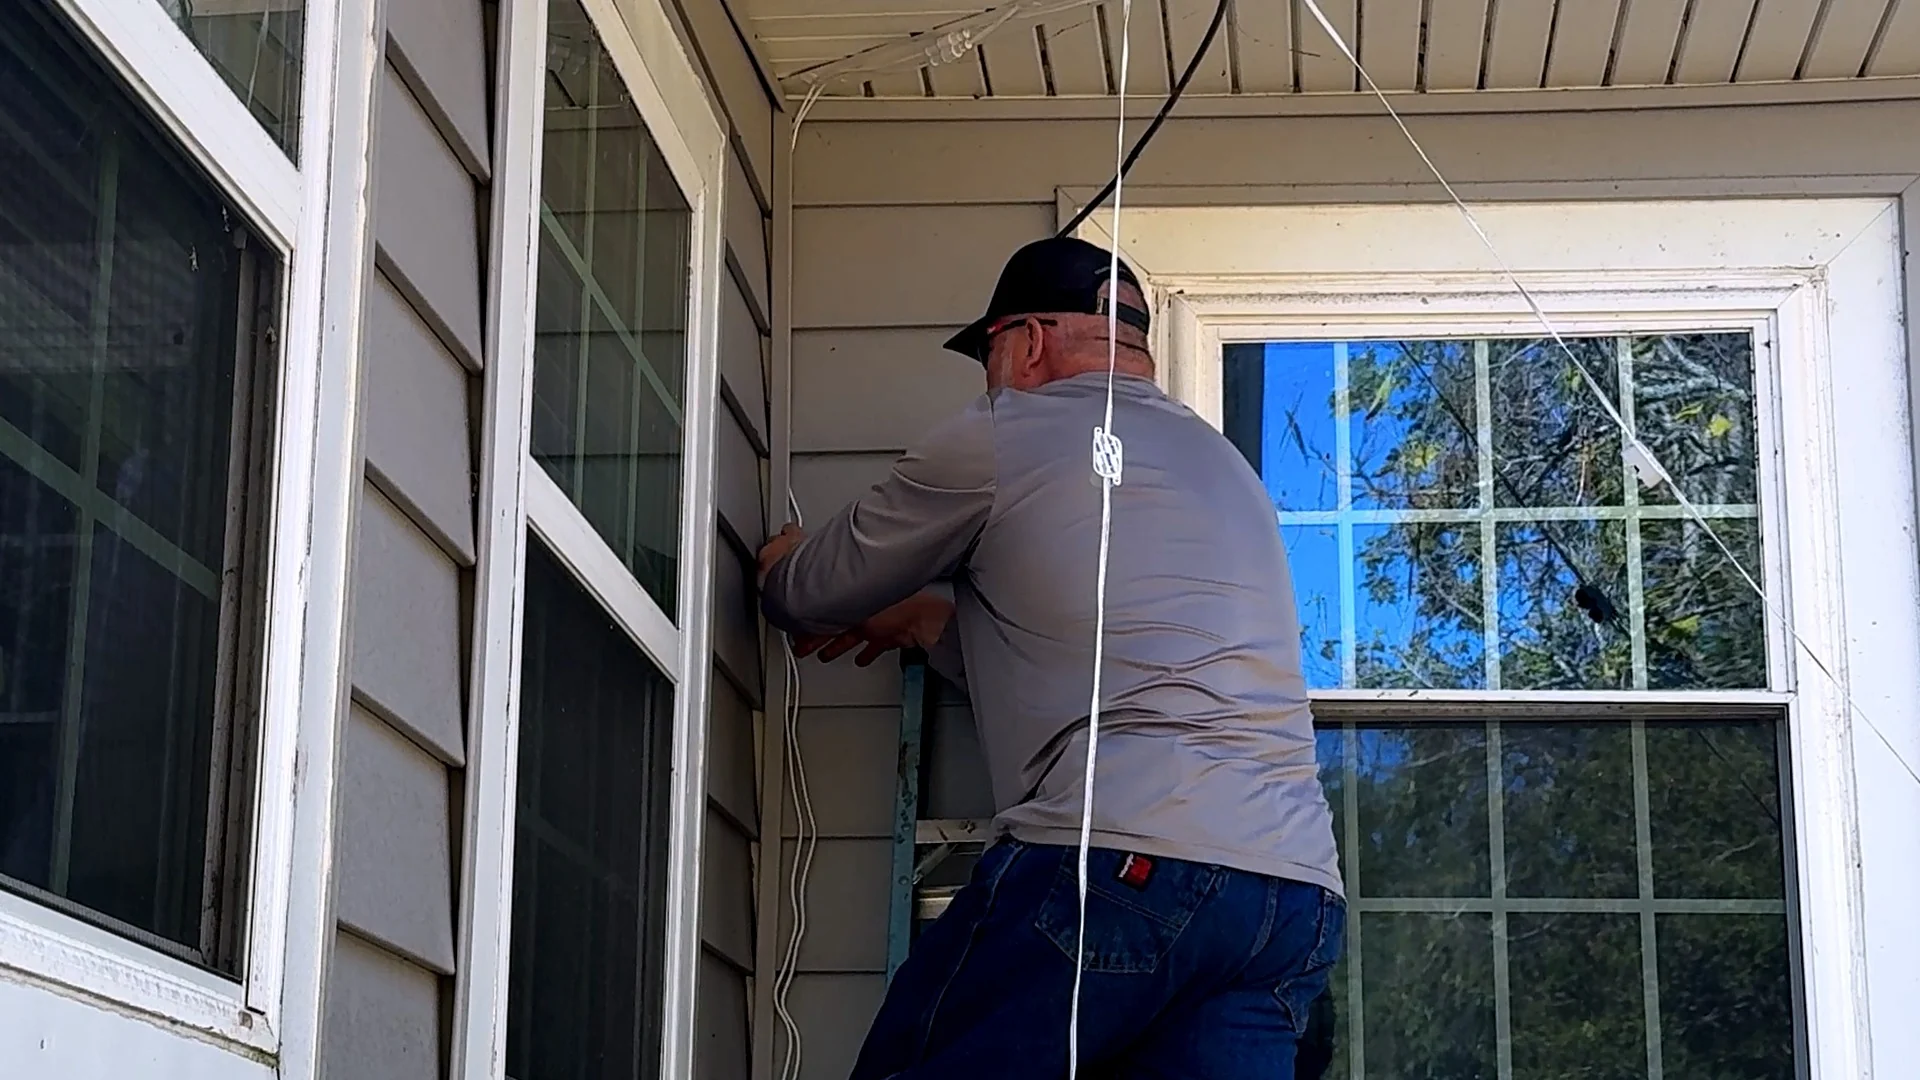
4. Connections, light counts and trimming
The 200-foot 2 Pro kit has a dual-output arrangement, allowing the power/controller connection to serve two lighting branches. The power-feed point can be placed at a suitable connection along the planned roofline instead of necessarily starting at one far end. In principle, this can make it easier to plan a front-and-back run or route around a central power point. CINOTON says the controller coordinates animations as one continuous lighting system.
Do not exceed the manufacturer’s branch-length or electrical limits: CINOTON advises keeping each single-side run under 200 feet. Before connecting anything, identify the controller ports and male/female ends on the actual components. Do not treat a conceptual wiring diagram as a substitute for the included connection instructions.
- 200 feet of modular lighting: 8 segments, each 25 feet long with 15 LEDs, for a total of 120 RGBCW light disks.
- Dual-output controller and 36V power system.
- 10-foot extension cable for routing around difficult sections.
- Mounting adhesive and clips; use the specified mechanical fasteners as directed.
- App and remote-control functions.
The product is advertised with 16 million RGB color choices, adjustable 2700K–6500K white light, more than 100 preset scenes, DIY color effects, IP67-rated light strings, an IP65 controller, and a manufacturer-claimed operating range of -4°F to 140°F. It also lists a 50,000-hour nominal lifespan; that is a manufacturer rating, not a lifespan we have personally measured.
- Bench-test everything. Connect the components according to the instructions and verify that all sections and controls operate before placing any fixtures on the house.
- Clean and dry mounting surfaces. Position a short sample run and check how the disks will look in daylight and after dark.
- Use adhesive and clips as directed. Do not rely on adhesive alone when the manufacturer calls for clips or other mechanical retention.
- Route wires carefully. Keep wiring clear of sharp edges, moving gutters, heat, and areas likely to be damaged by tools or maintenance.
- Use the extension cable where appropriate. Plan around corners, gutters, and changes in elevation without putting tension on the connections.
- Cut or splice only as permitted for this exact model. The product listing describes cuttable, reconnectable wiring and lists separately sold waterproof splicing connectors (ASIN B0FJY7MJM9). Follow its polarity, conductor-matching, sealing, and connection instructions precisely; never leave open conductors exposed or assume a generic connector is compatible.
- Weather-protect the power connection. IP67 for the light string does not make the plug or power adapter suitable for immersion or unprotected exposure. Use an appropriate, GFCI-protected outdoor receptacle and weatherproof in-use cover, or a dry permitted indoor location.
Pool safety: An outdoor outlet or controller near a pool does not automatically meet electrical code simply because the LED side is 36V. Follow applicable pool separation, GFCI, and listed-equipment requirements, and use a qualified electrician where needed.
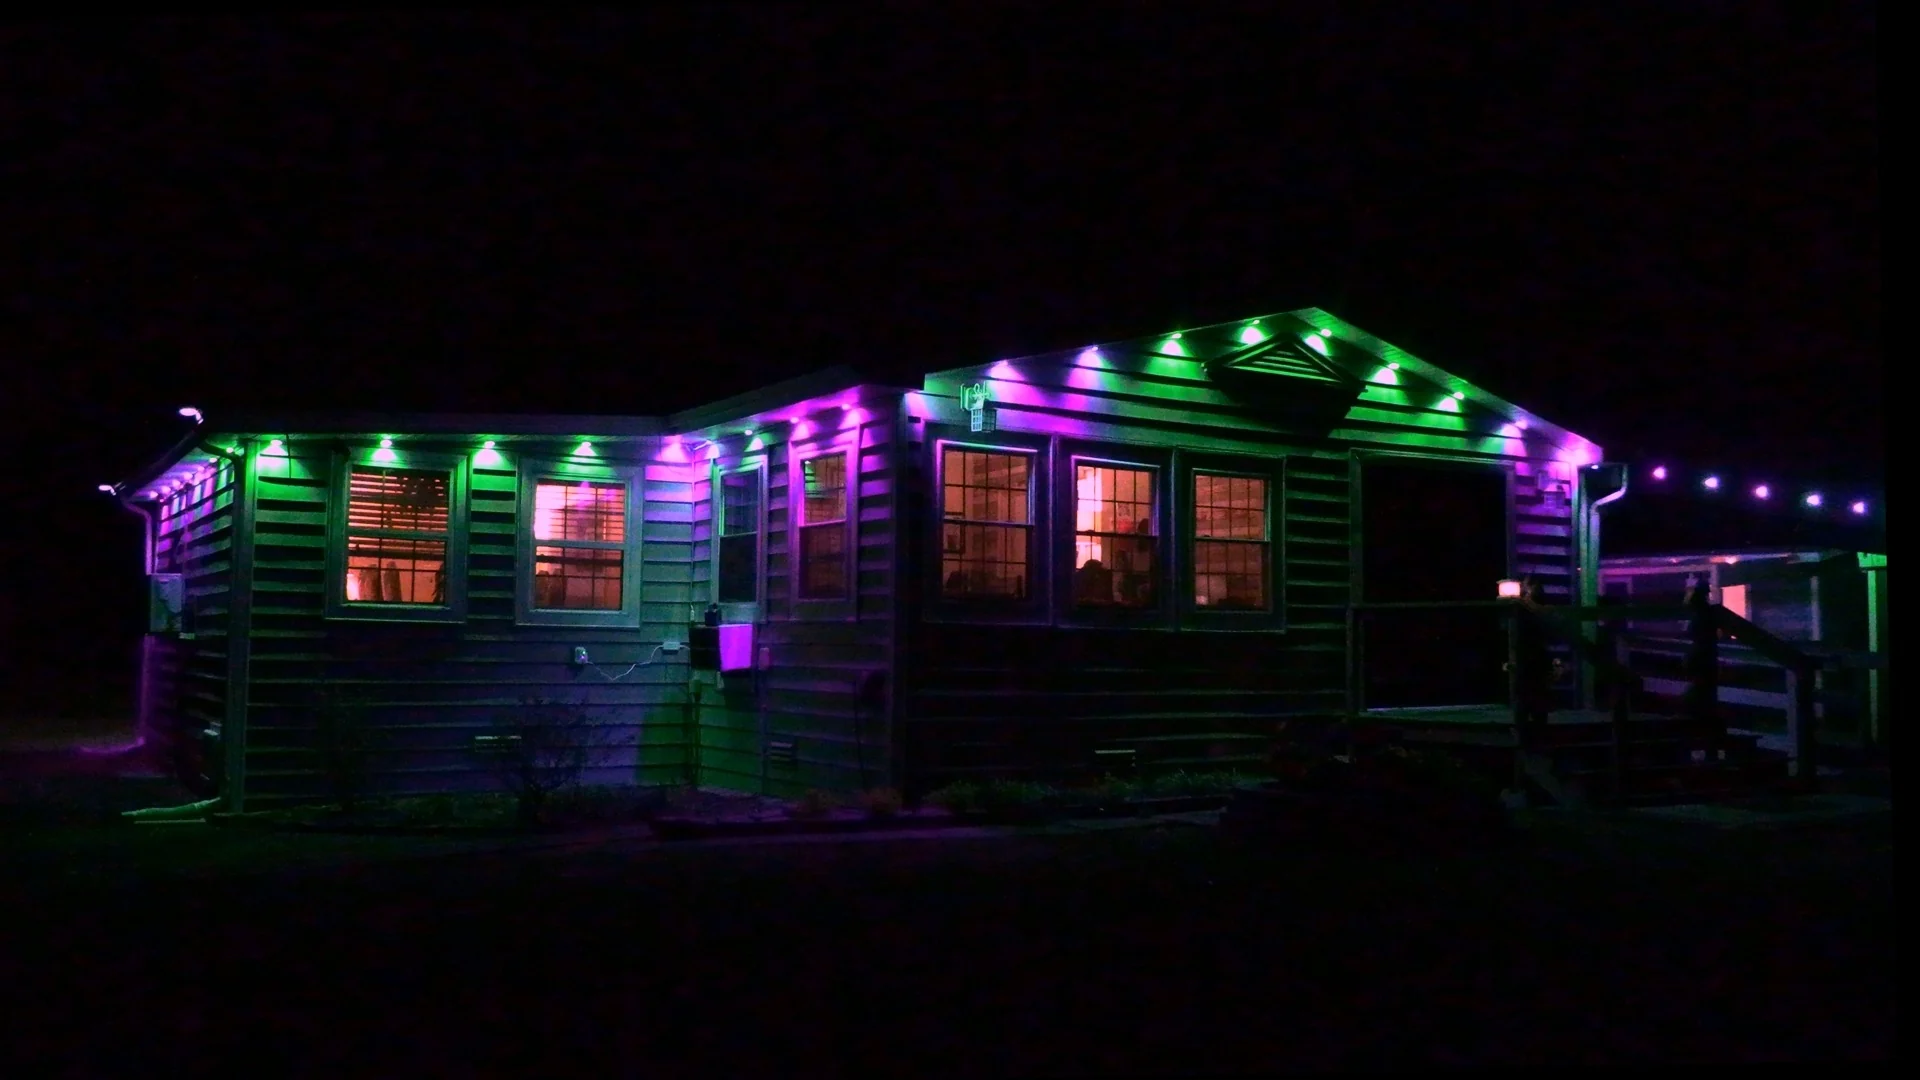
After permitted trimming, update the number of installed lights in the app so patterns and animations match the actual run. Never leave a cut wire or connector end exposed to moisture.
5. App settings, color controls and timers
For our installation, we chose the dedicated CINOTON app rather than switching back and forth between CINOTON and Smart Life. CINOTON has said that switching apps can require resetting and re-linking the controller, so it is better to choose one setup path and finish pairing before exploring scenes.
- Install the CINOTON app and sign in.
- Power the controller and follow the included pairing procedure. If pairing fails, confirm your phone is on a compatible 2.4GHz Wi-Fi network and that the controller has a good signal.
- Add and name the outdoor lighting device. If available, set the actual light count and layout to match installed sections.
- Try warm white, cool white, solid colors, holiday scenes, and DIY effects.
- Set a lighting schedule, then test that the selected event turns the system on or off as intended.
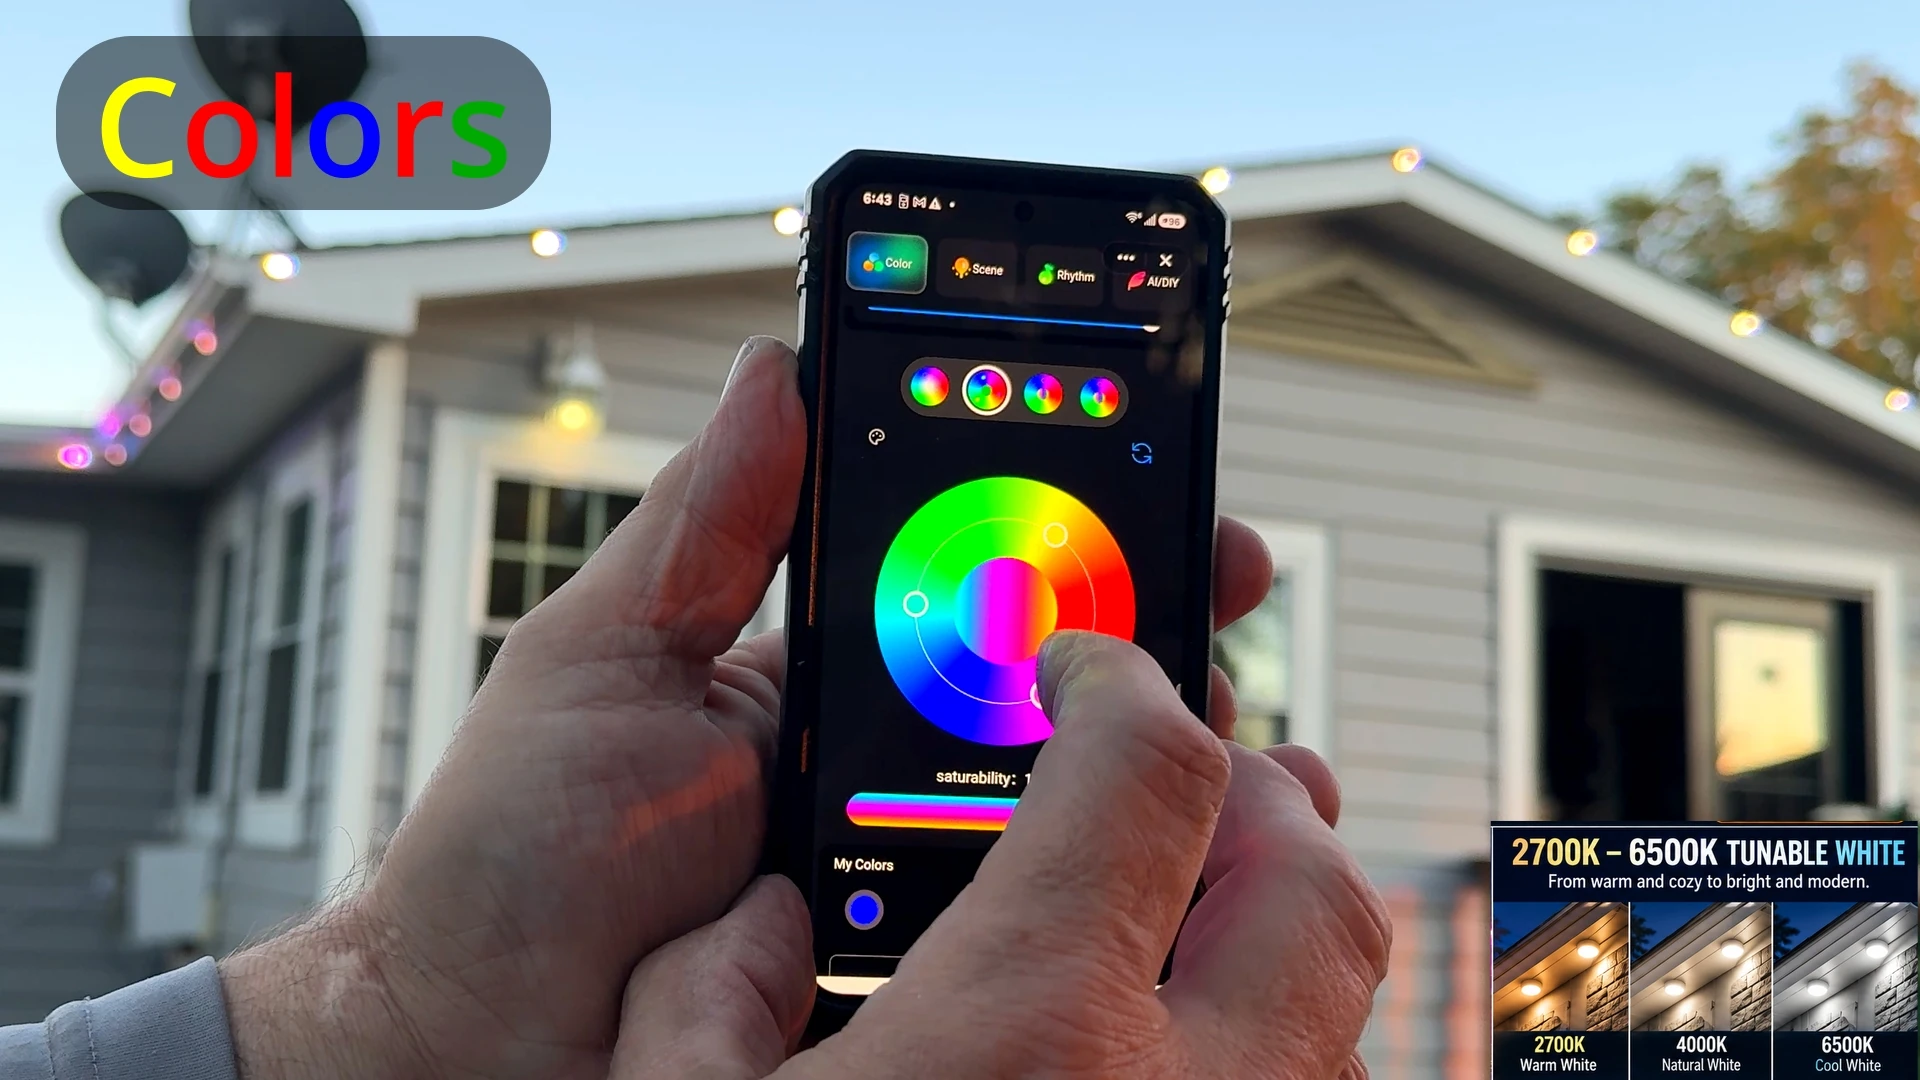
The Color controls let you choose RGB colors and adjust the warm-to-cool white appearance. The image below shows the actual CINOTON color wheel used during the installation, not a music-sync screen.
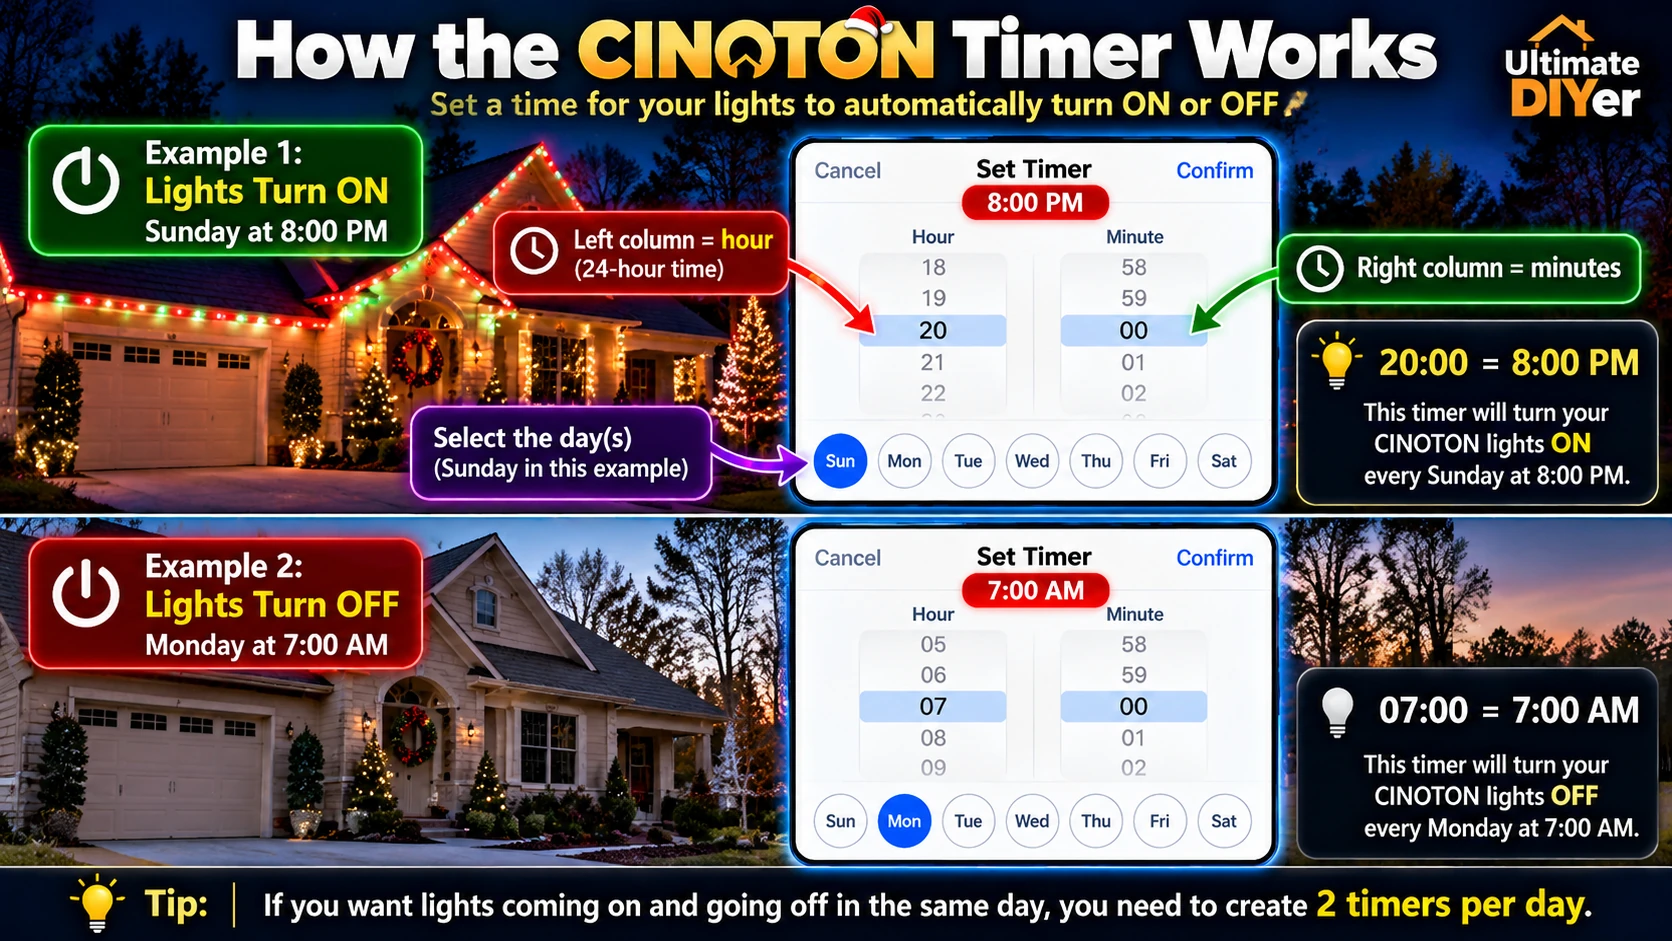
How the CINOTON scheduling timer works
The scheduling screen uses a 24-hour clock: the left column selects hours from 00 to 23, and the right column selects minutes from 00 to 59. Select the days of the week the event should repeat.
For example, to turn the lights ON Sunday at 8:00 PM, set an ON event for Sunday at 20:00. To turn them OFF Monday at 7:00 AM, create a separate OFF event for Monday at 07:00. In other words, you need two timer events for an automatic on-and-off schedule. Make sure the weekday selected for an after-midnight OFF event is the following calendar day.
Timer example: To switch lights ON Sunday at 8:00 PM, set Sunday 20:00 as an ON event. To switch them OFF Monday at 7:00 AM, create another event for Monday 07:00 and select OFF. The left picker is 00–23 hours; the right picker is 00–59 minutes. An after-midnight OFF event belongs to the next calendar day.
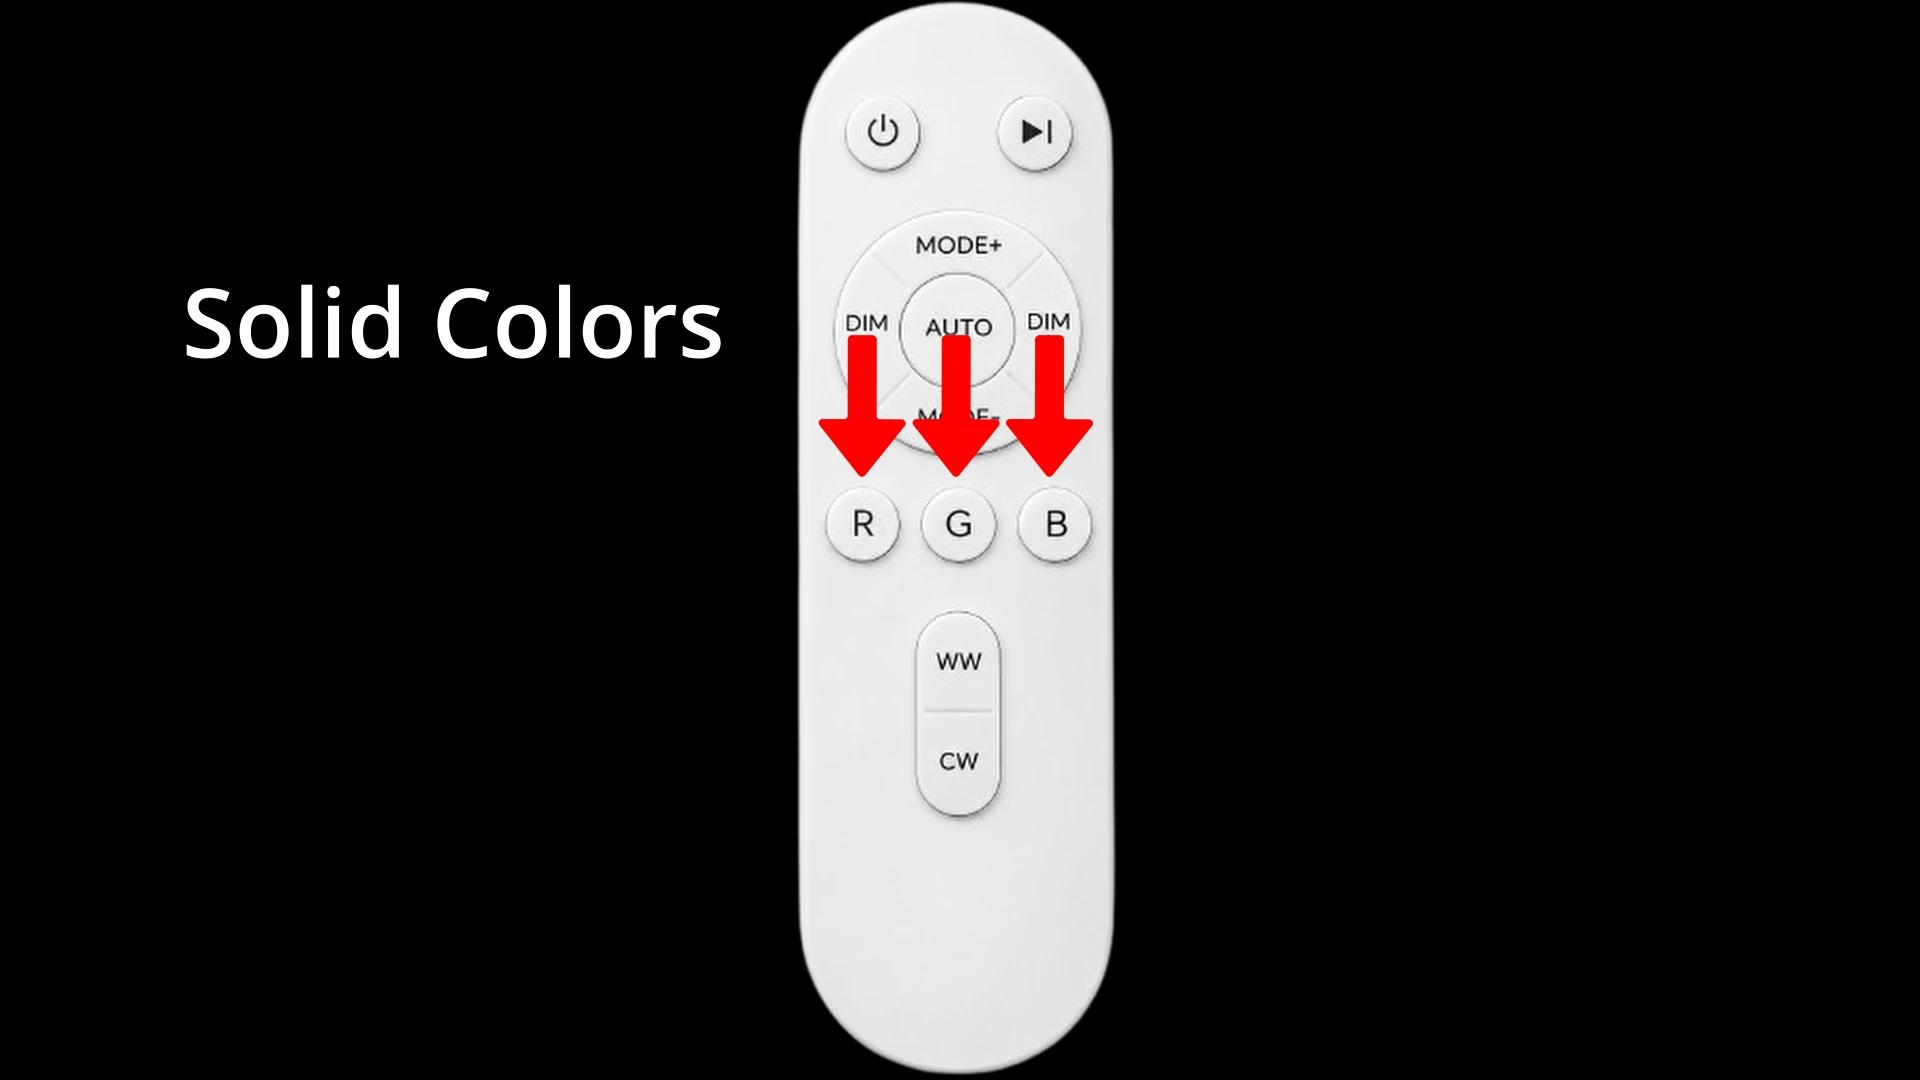
6. Remote-control shortcuts
Use the handheld remote for quick adjustments without opening the app. The R, G and B buttons select solid primary colors; WW selects warm white and CW selects cool white. Brightness, power and mode buttons are also available. The most recent remote or app command may override a previously selected effect.
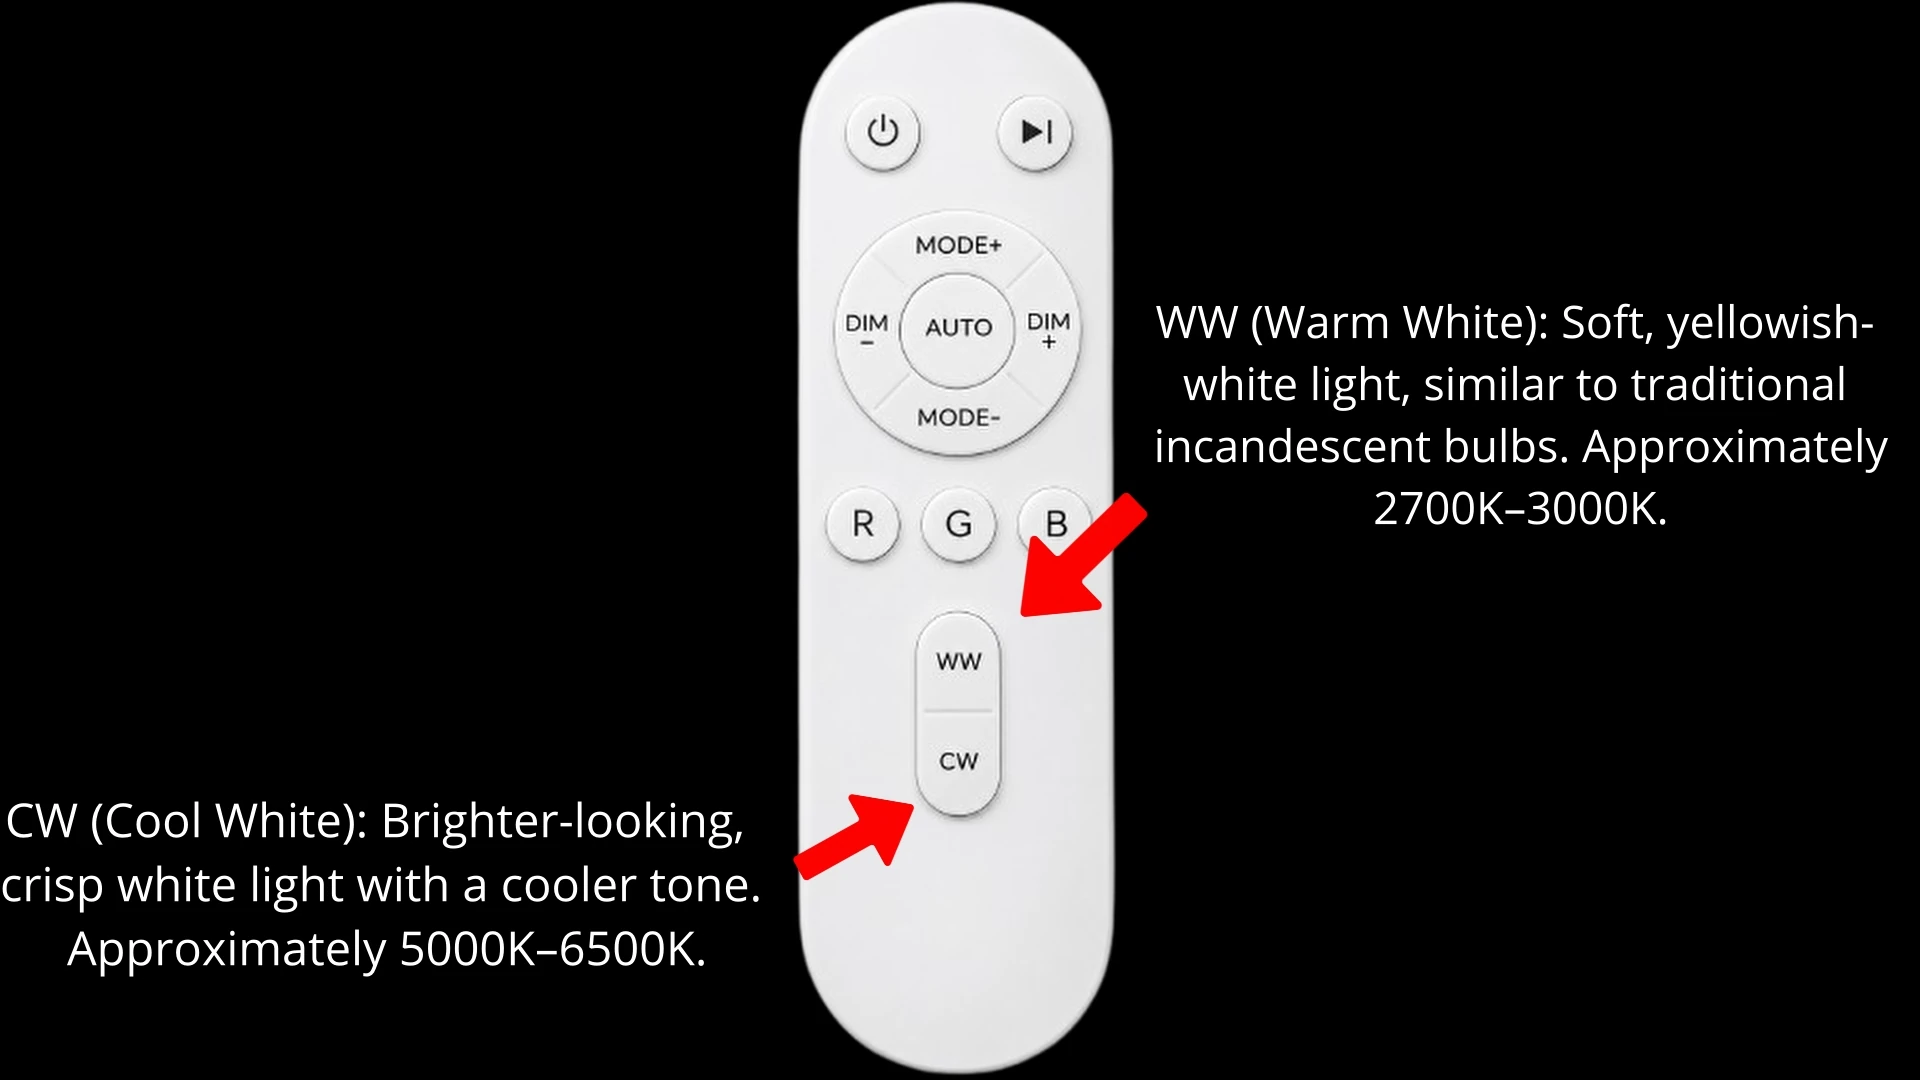
CINOTON describes its handheld remote as an RF remote with an approximate 30–50-foot range; range and wall penetration can vary. The brand’s instructions indicate that app and remote commands operate independently and the most recent command takes effect. For Alexa, CINOTON provided the path Me → Third-Party Voice Services → Alexa → Link to Amazon Alexa. Google Assistant compatibility is also advertised. Confirm which individual voice commands work on your installation rather than assuming every animation or special mode can be voice-controlled.
For additional family phones, CINOTON provided a Home Management/Share Device invitation process. The safest approach is to invite a second registered account instead of resetting the device or sharing login credentials.
7. Music-sync modes: what actually changes
Rock, Jazz, Classic, Scroll, Energy and Spectrum all work through the CINOTON app. These are different lighting response patterns, not separate microphones or ways to send music to the system. Select a mode in the app, play a song through an external speaker near the inline controller, and watch how the lights react to the sound.
Depending on the selected mode, you will see different color transitions, pulses, movement and perceived reaction speed or intensity. The names suggest styles, but they do not verify a particular beat-detection algorithm. To compare fairly, play the same song at the same volume and switch between the app’s modes.
Examples of different app music patterns
These examples show the visual styles associated with music modes; a still image cannot capture their movement. They are illustrative concepts, not footage of the finished project.
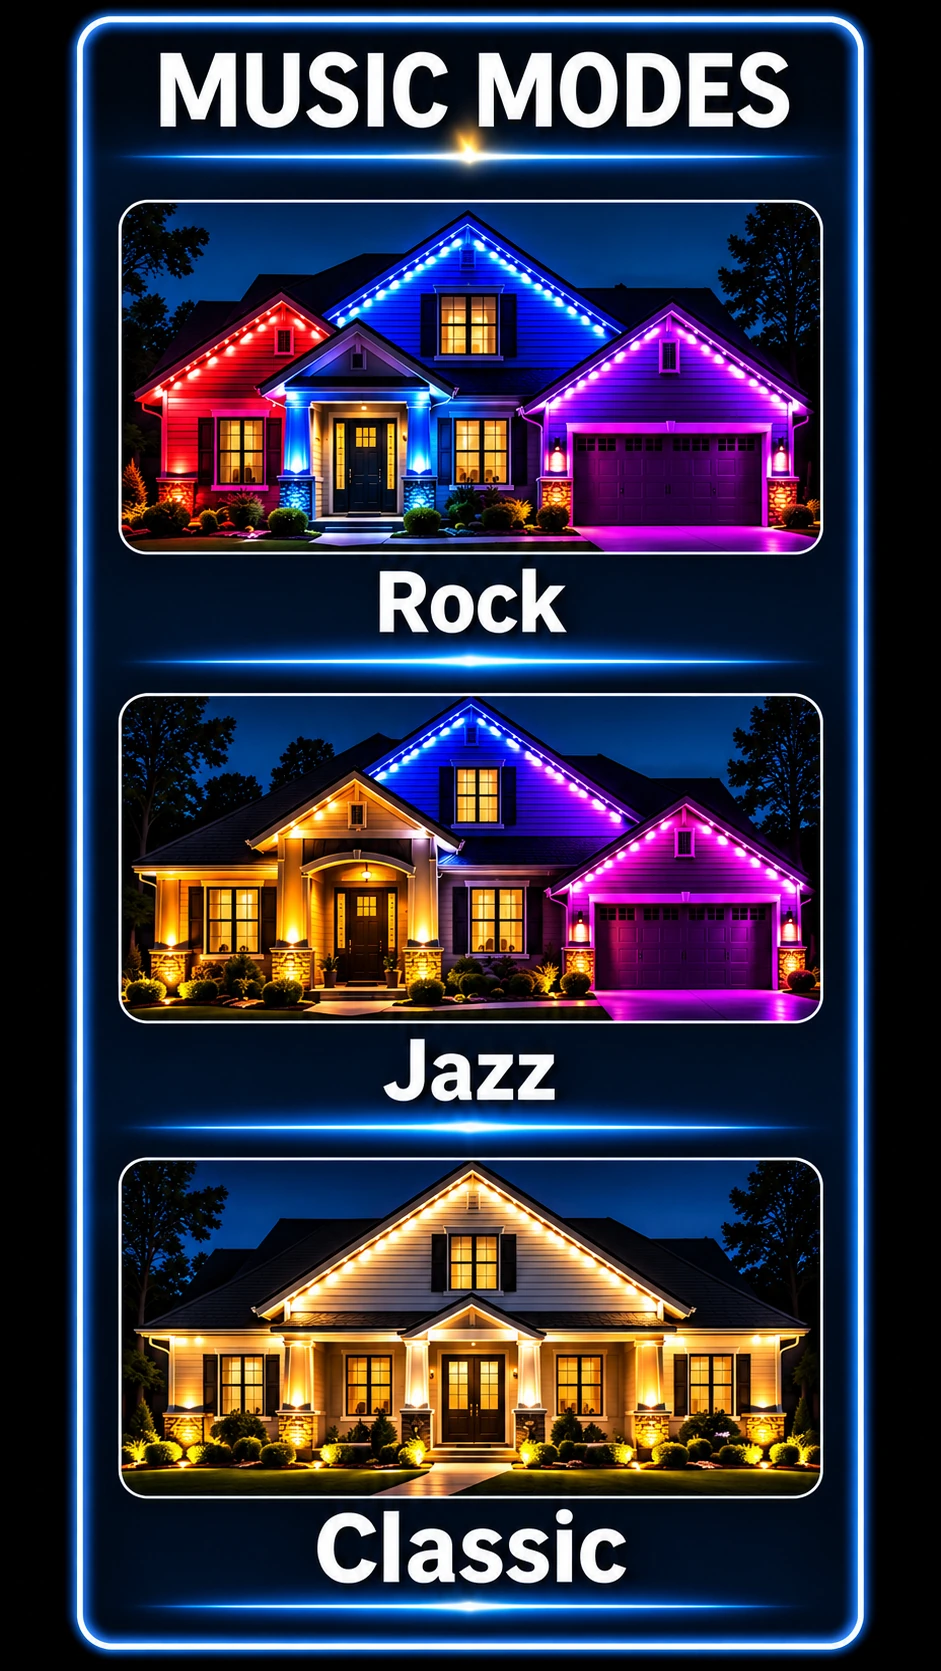
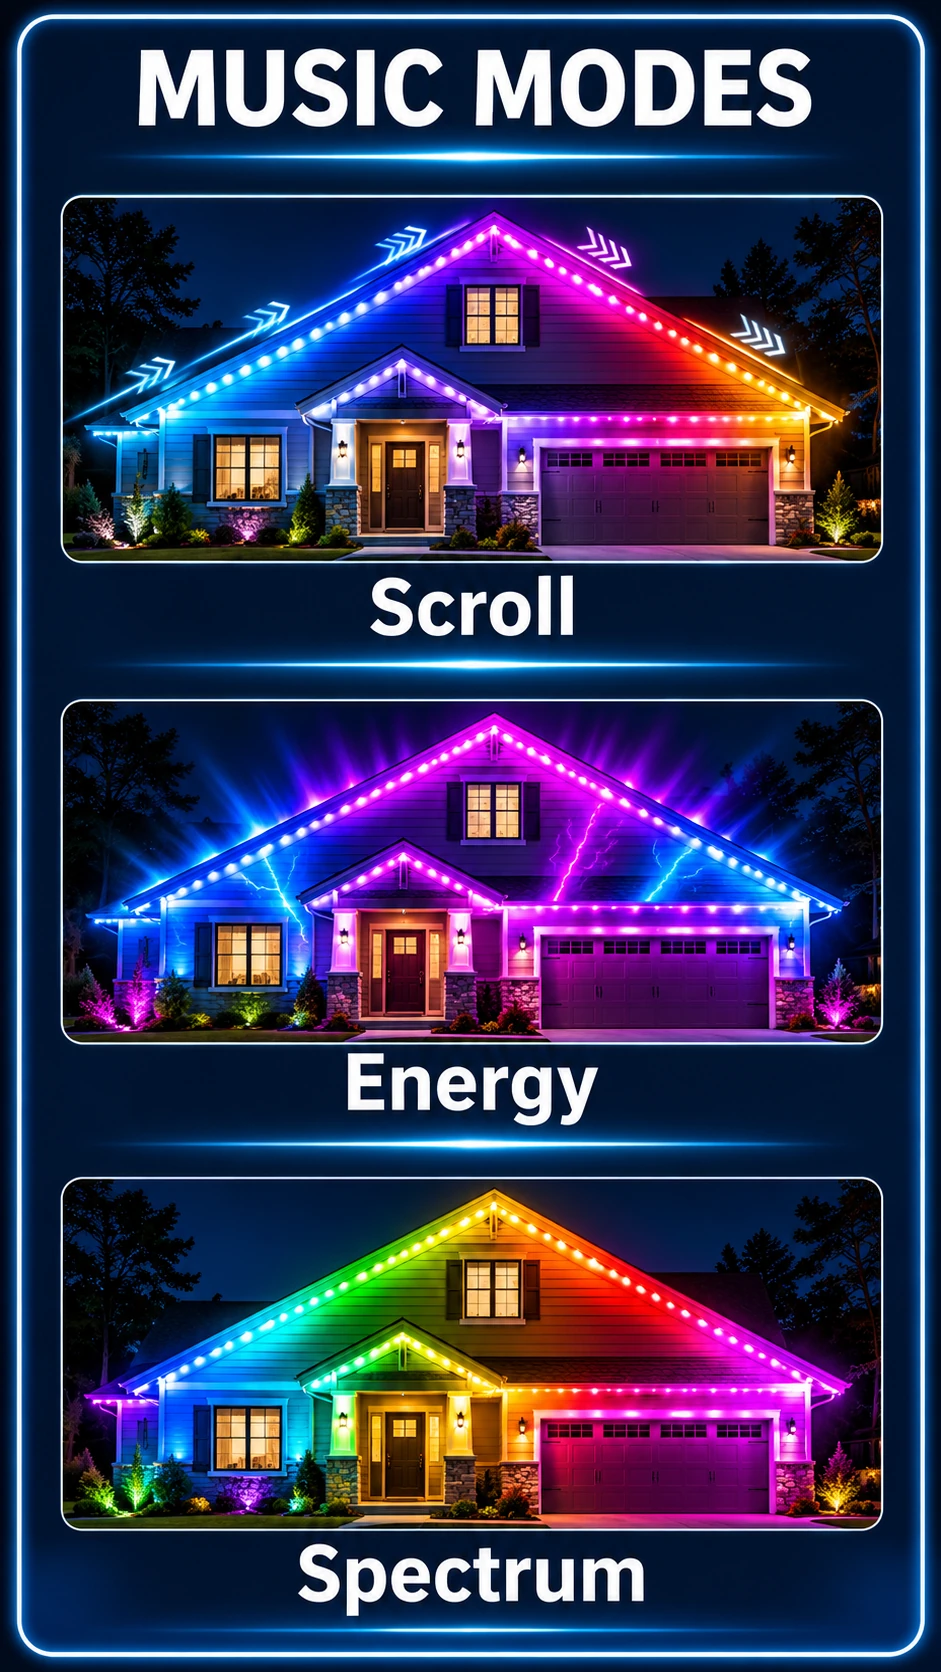
Music-sync troubleshooting: First verify the Rhythm or music mode is active. Move the speaker closer to the inline controller microphone, use an audible volume at that location, and reduce background noise. Test several songs and patterns. A controller mounted near the street may not pick up music played beside a backyard pool.
Do not assume individual-light on/off choices can be combined with every music-sync mode until you have tested that behavior on the exact installed controller.
8. Actual lighting examples and wall wash
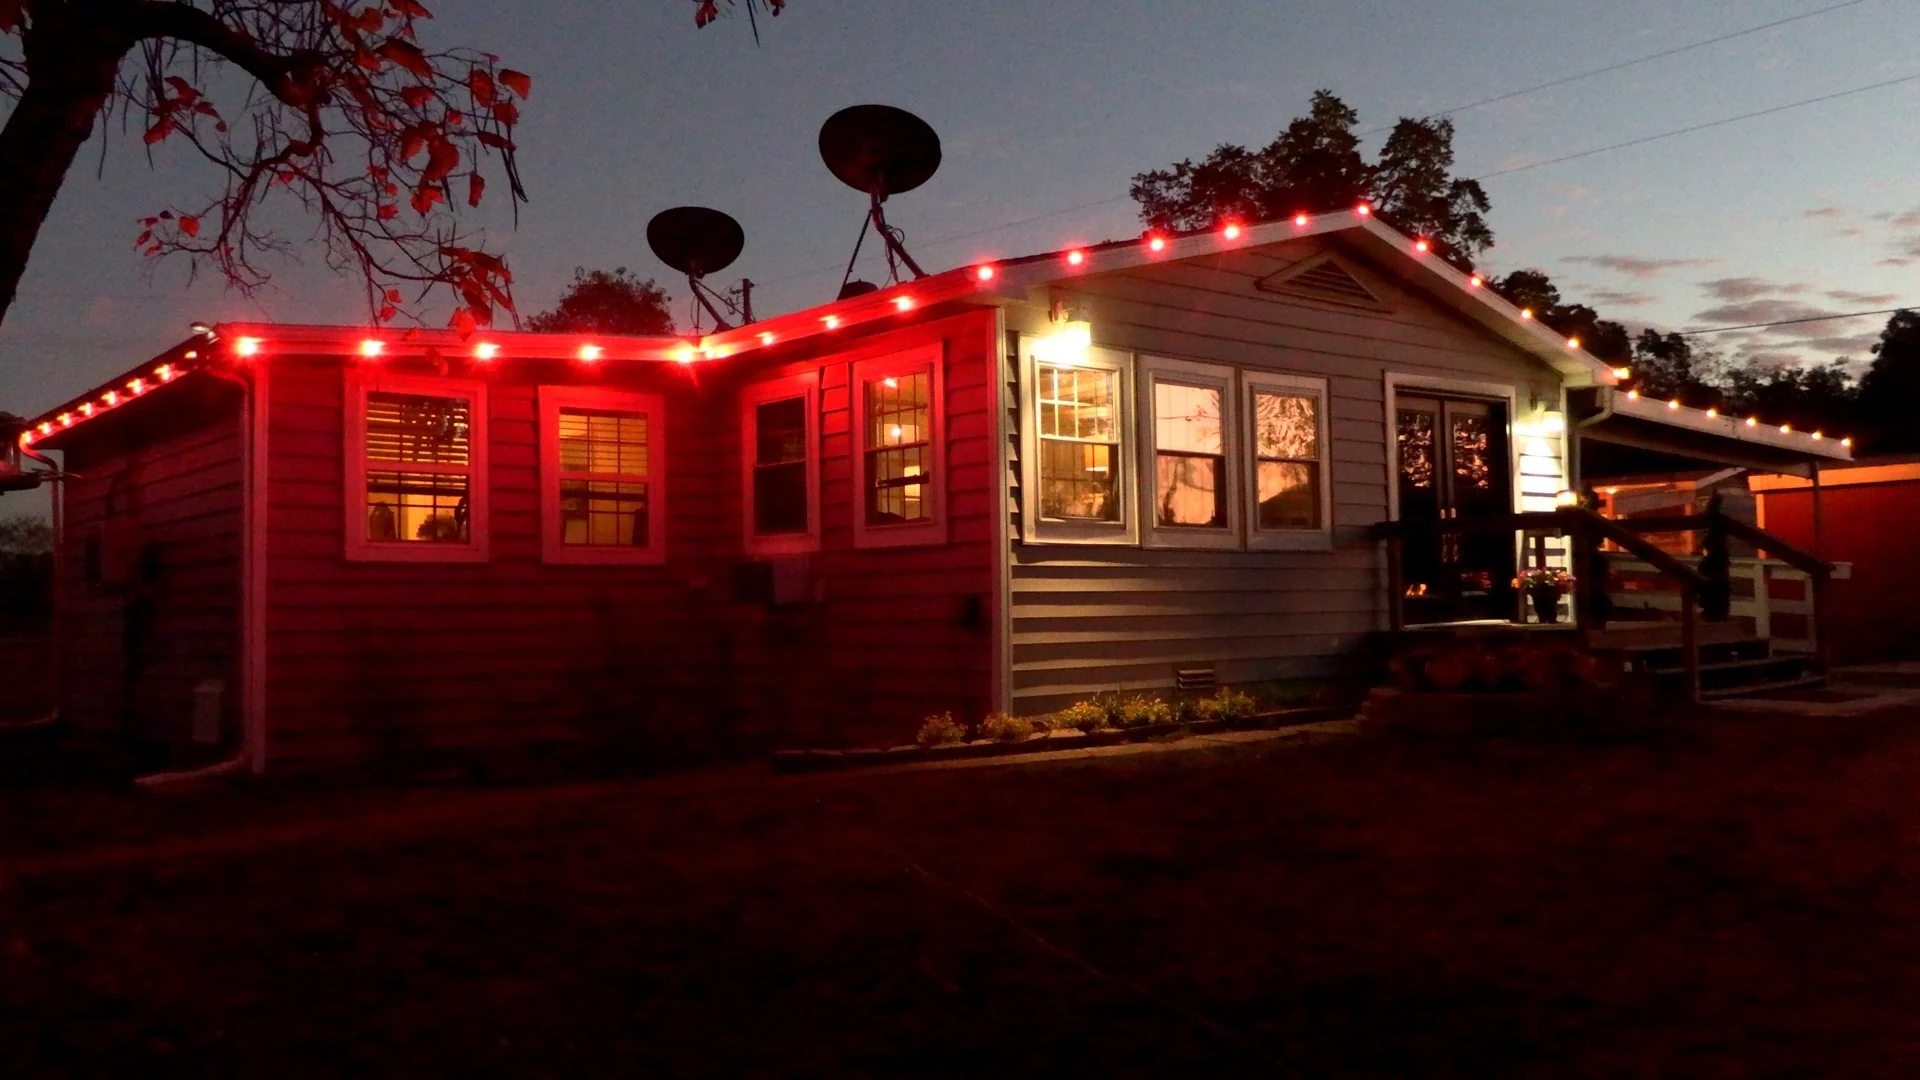
The next two photographs show real results from this installation: colorful red-and-green lighting and everyday white accent lighting. This is separate from the digitally illustrated green/magenta example that follows.
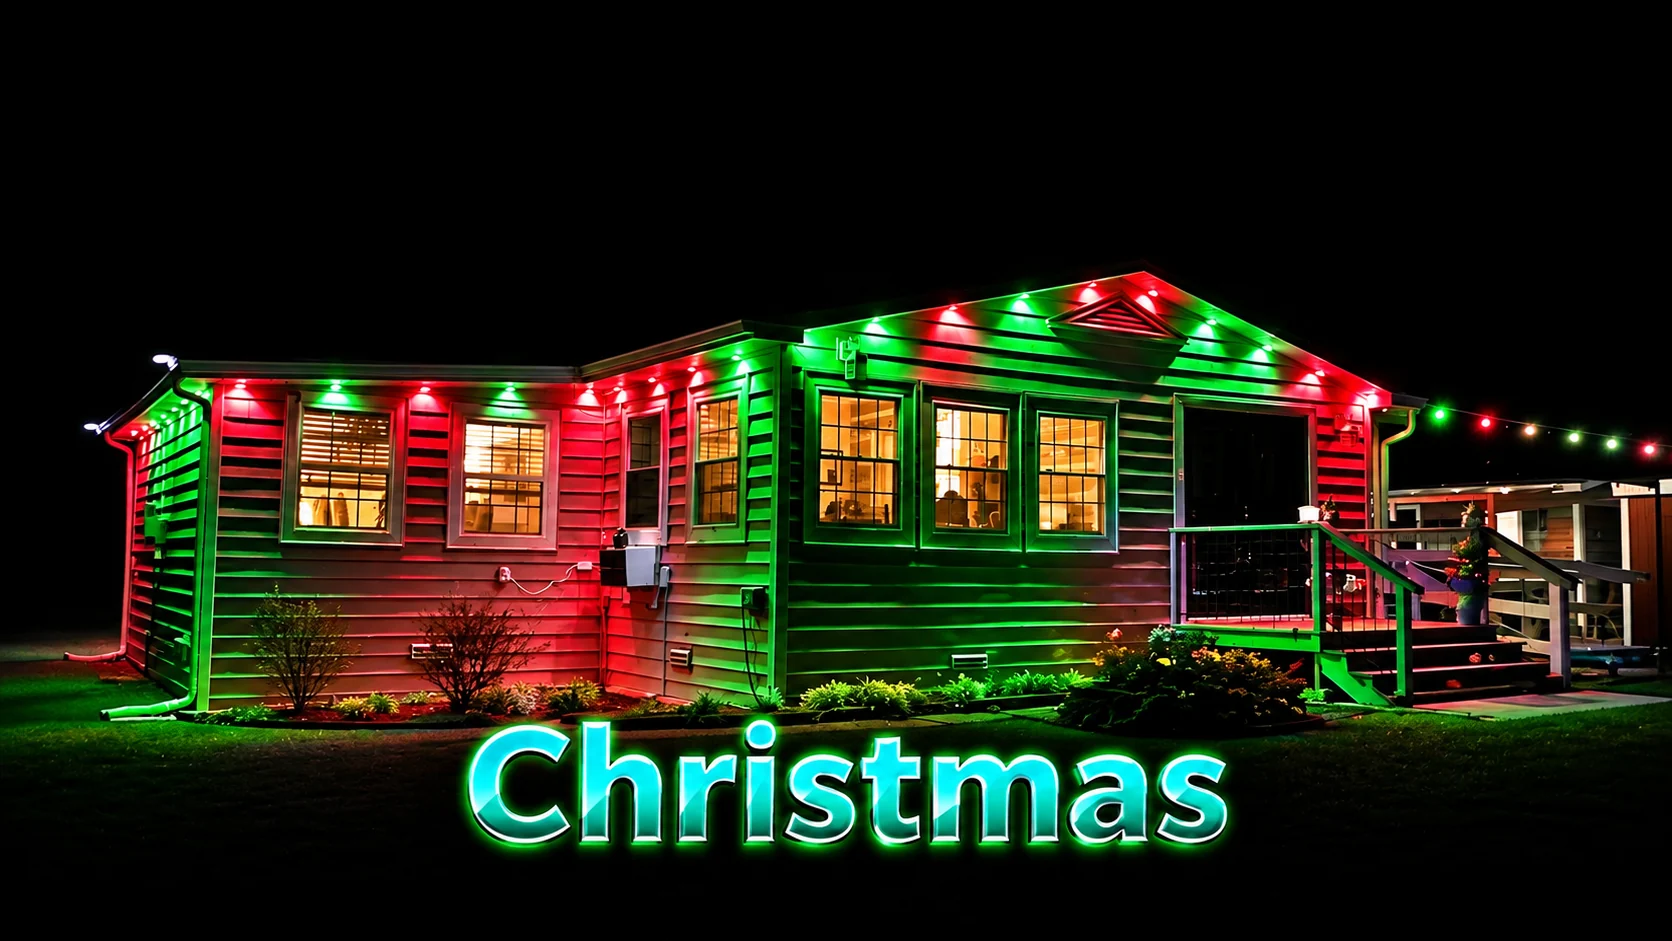
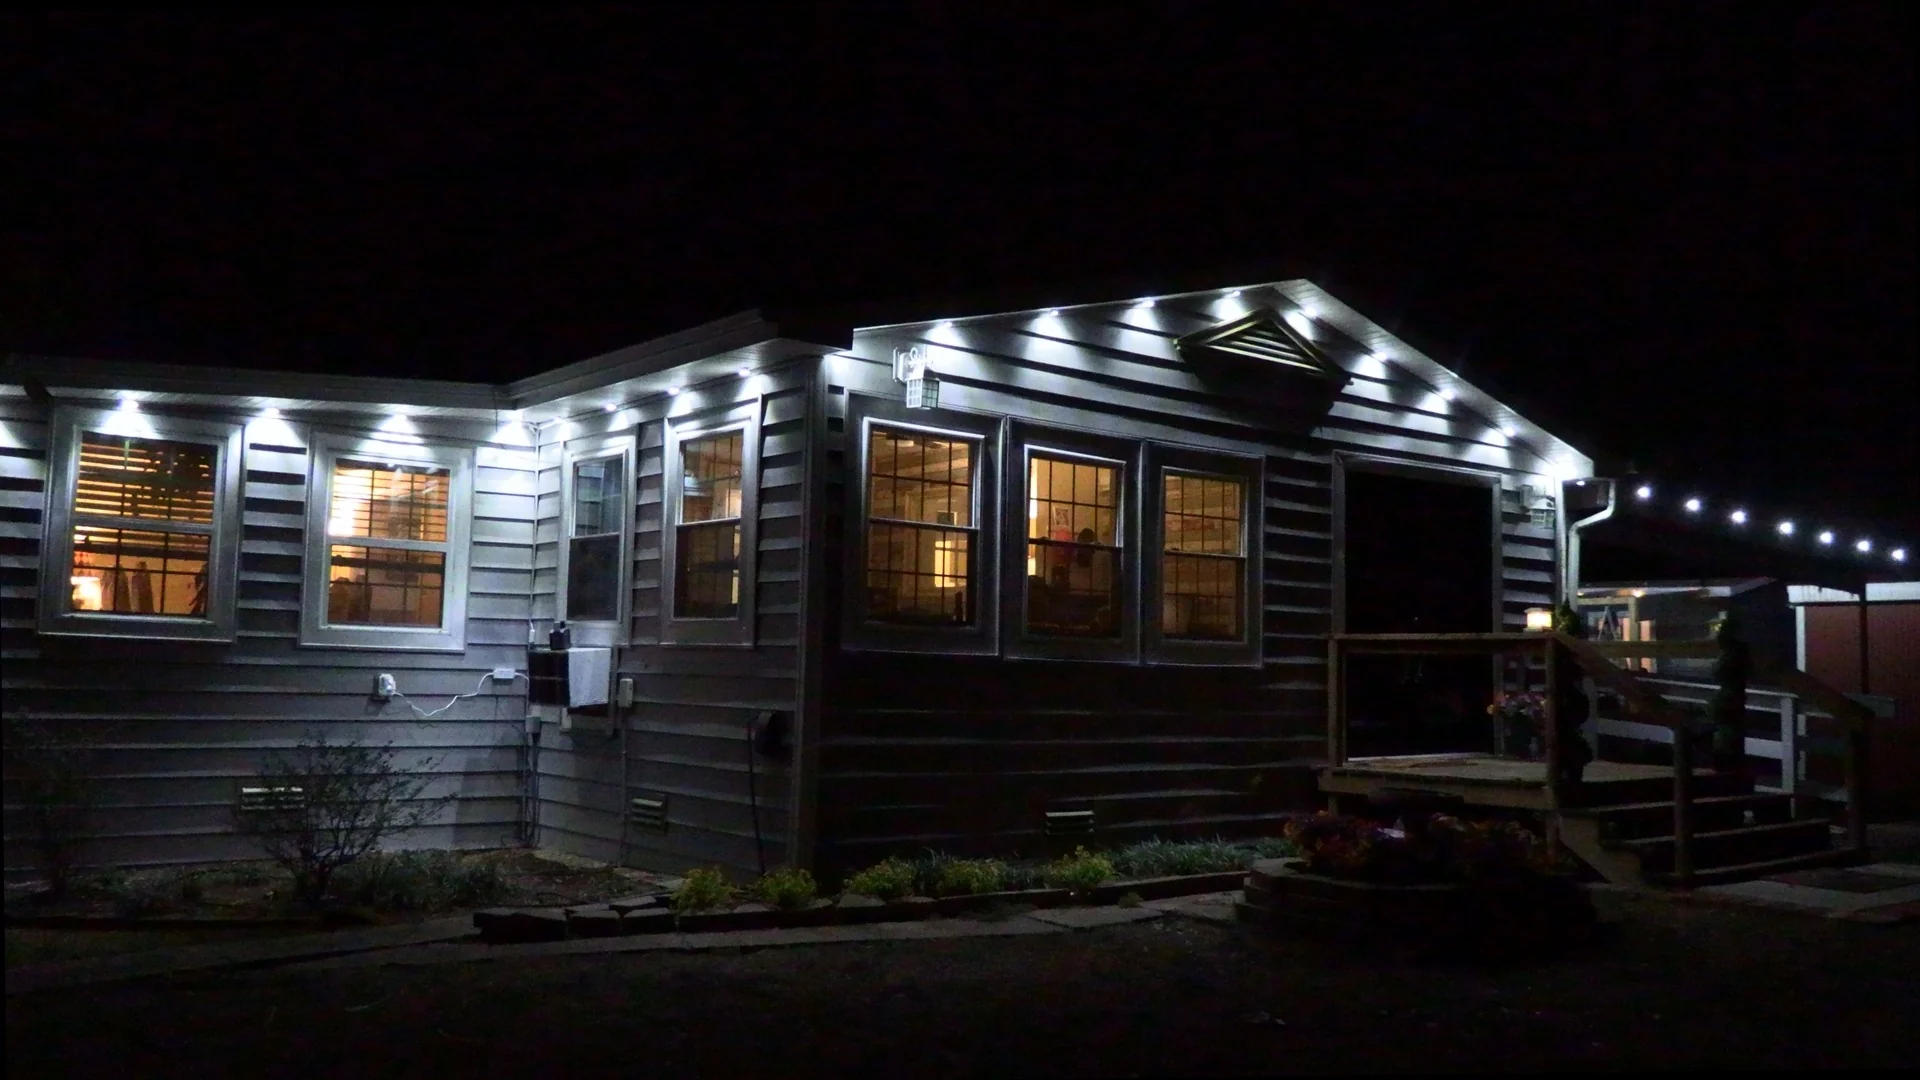
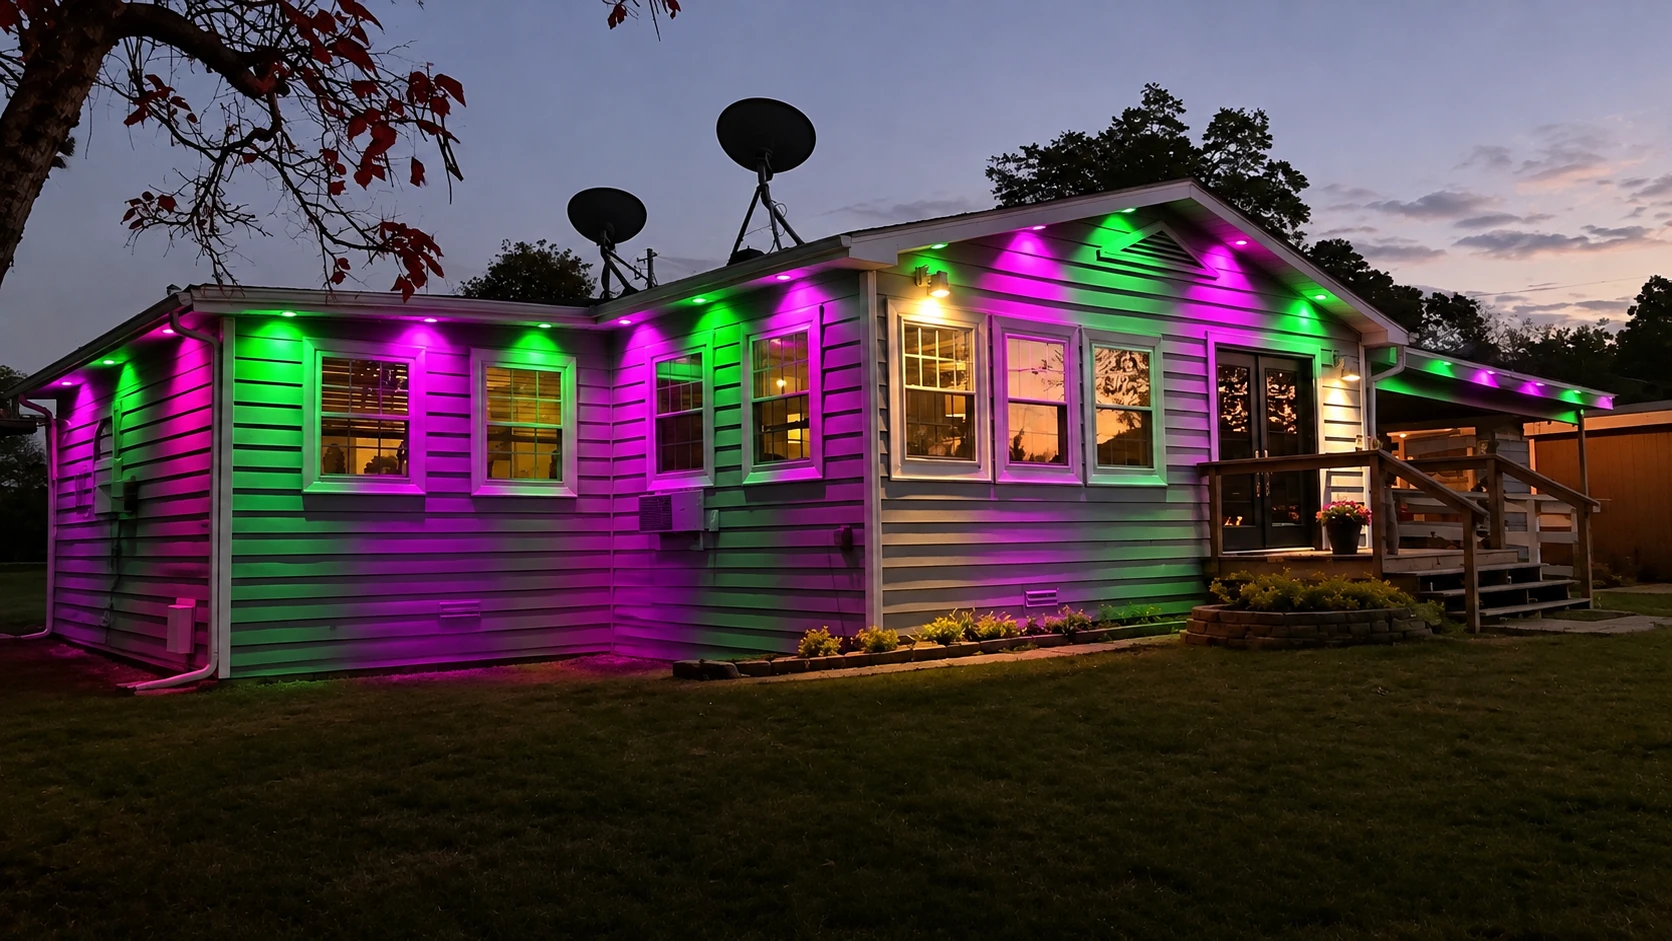
Inspect the wash and shadow pattern across windows, trim, doors and columns. A dramatic color setting is useful for events, but many homeowners will prefer warm or cool white for everyday accent lighting.
9. Holiday color combinations
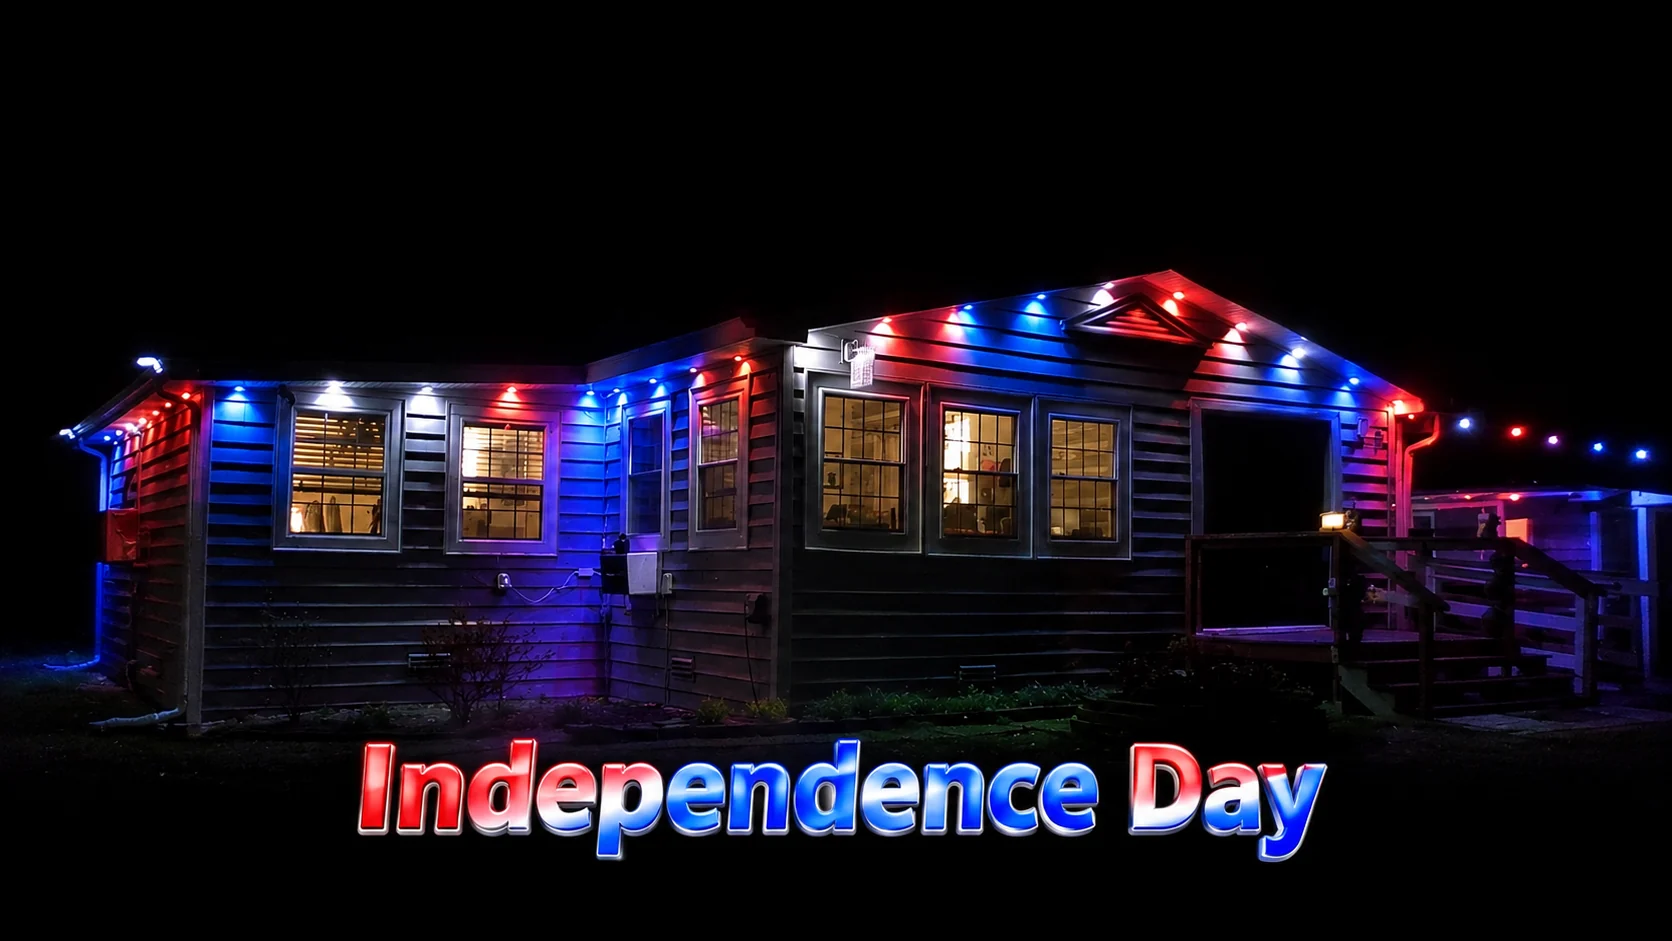
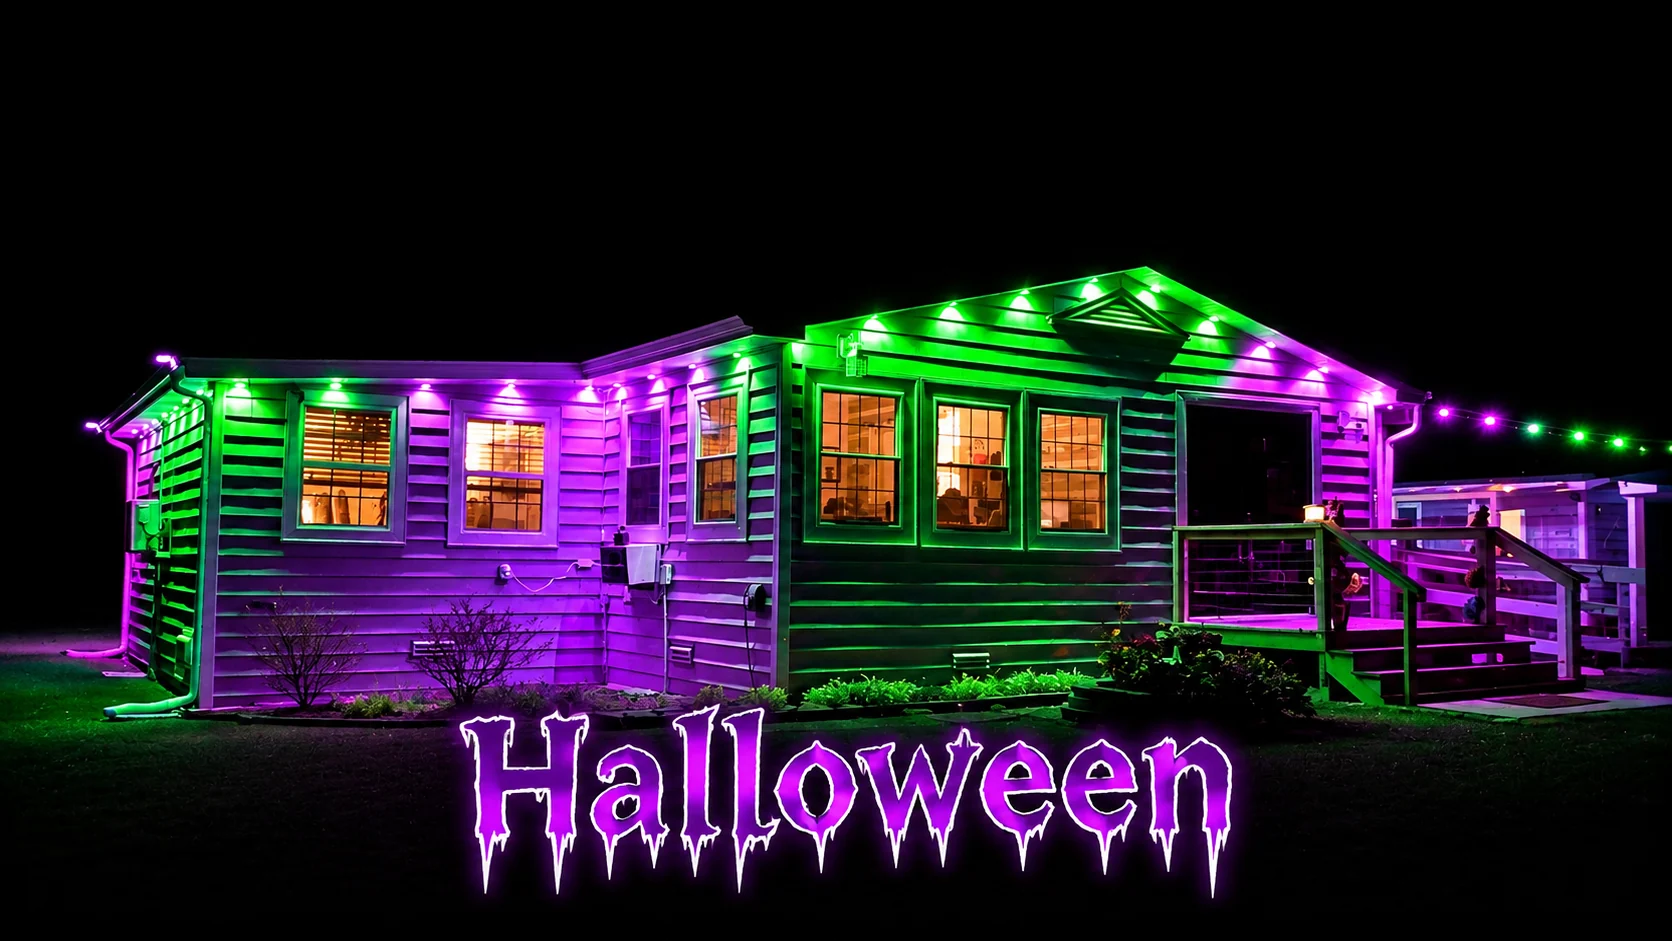
Permanent outdoor lights let the same home change with the season, without taking down and reinstalling temporary strands. Keep the photographs at their original proportions and compare the color combinations below.
What we would do differently next time
The first decision is not which holiday preset looks best; it is what you want the house to look like most nights of the year. Choose traditional roofline mounting where you want obvious festive light points, and under-eave mounting where you prefer quieter downward accents. Measure the whole project first, test a few fixtures at night, and plan your controller location with your music source in mind.
I would also take the extra time to identify the power-connection layout, mount the system with service access in mind, and complete the app and scheduling tests before calling the project finished. Small decisions made on the ground can save a lot of time on a ladder.
Frequently asked questions
Can I use permanent lights every day, not just for Christmas?
Yes. The 2700K–6500K adjustable white modes allow a more neutral everyday appearance, while RGB scenes can be used for holidays and events.
Do the lights point at the wall when mounted under the soffit?
No. These flat disks emit light straight out of their faces. A flat horizontal soffit installation points them downward. The amount of siding illumination varies by placement and house geometry.
Can I mount the power controller halfway through the roofline?
The product is advertised with a dual-output layout that can support a central power-feed point. Plan exact connections and branch limits according to the supplied instructions.
Will the microphone pick up poolside music?
It may, if the inline controller is near enough to the music source. Test the listening distance before deciding where to mount and protect the controller.
Can one timer turn the lights on and off?
For the schedule configuration we examined, create separate ON and OFF timer events. An evening ON time followed by a next-morning OFF time also requires selecting the correct days.
Are the lights and power adapter completely waterproof?
No. The manufacturer lists IP67 light strings and an IP65 control box. Protect the adapter and outlet as required; do not equate a water-resistant enclosure rating with permission to submerge or expose every component.
Final thoughts
Permanent lights can do much more than replace a few strands of Christmas decorations. The real opportunity is to choose the right installation style so the same system looks good in everyday white, dramatic holiday color, and everything in between. Explore more Ultimate DIYer DIY installation guides.